Crochet Tooth Fairy Pillow Pattern
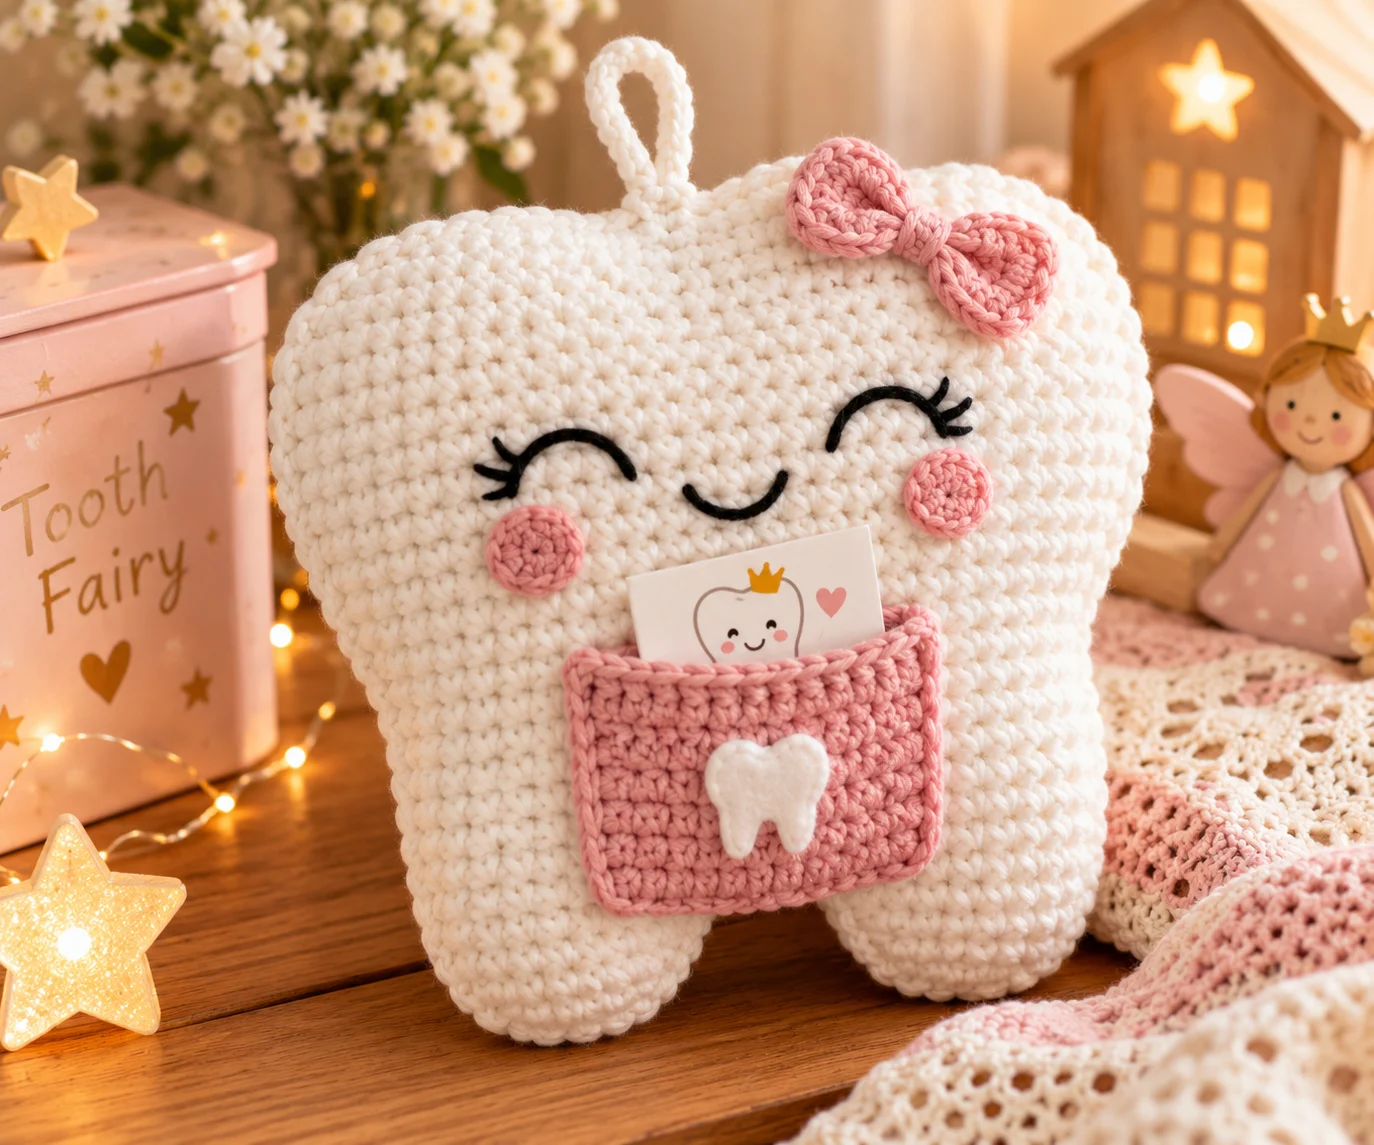
Make losing a first tooth a little more magical with this adorable crochet tooth fairy pillow. This beginner-friendly project features a soft tooth-shaped pillow with a handy pocket where children can leave their lost tooth for the tooth fairy.
A tooth fairy pillow is also a wonderful keepsake that can be reused every time a child loses a tooth. Similar crochet designs commonly use a small pocket so the tooth can be exchanged easily without searching underneath a regular pillow.
This original pattern creates a simple tooth-shaped pillow with a front pocket, embroidered face, and optional hanging loop.
Project Overview
Project Type: Crochet tooth fairy pillow
Skill Level: Beginner
Crochet Terminology: US
Finished Size: Approximately 7 x 8 inches
Construction: Two crocheted tooth panels joined and lightly stuffed
Main Stitch: Single crochet
Pocket: Crochet rectangle sewn onto the front
Materials
You will need:
• Worsted-weight yarn in white or cream, approximately 150 yards
• Small amount of pink yarn for the cheeks
• Small amount of black yarn for the face
• 4 mm crochet hook
• Fiberfill stuffing
• Tapestry needle
• Scissors
• Stitch markers, optional
For a child-friendly pillow, embroidered facial features are preferable to small plastic pieces that could detach.
Crochet Abbreviations
• ch – chain
• sc – single crochet
• inc – single crochet increase
• dec – single crochet decrease
• sl st – slip stitch
• st – stitch
• sts – stitches
• rep – repeat
• FO – fasten off
Gauge
Gauge is not critical for this project.
The most important consideration is creating a firm, even fabric without large gaps between stitches.
If your stitches are very loose, try a smaller hook.
Finished Size
The finished tooth fairy pillow is approximately 7 x 8 inches.
Your finished dimensions may vary depending on yarn, hook size, and tension.
How to Crochet the Tooth Fairy Pillow
The pillow is made from two matching tooth-shaped panels. After the two pieces are crocheted, they are joined around the edge and lightly stuffed.
The pocket is made separately and sewn onto the front of the pillow.
Tooth Panel
Make 2.
Row 1
Ch 15.
Sc in the 2nd ch from hook and in each ch across.
14 sts
Ch 1 and turn.
Row 2
Sc across.
14 sts
Ch 1 and turn.
Row 3
Inc in the first st, sc across to the last st, inc in the last st.
16 sts
Ch 1 and turn.
Row 4
Sc across.
16 sts
Ch 1 and turn.
Row 5
Inc in the first st, sc across to the last st, inc in the last st.
18 sts
Ch 1 and turn.
Rows 6–8
Sc across.
18 sts
Ch 1 and turn after each row.
The upper section of the tooth should now be noticeably wider than the base.
Shaping the Tooth
Row 9
Dec over the first 2 sts, sc across to the last 2 sts, dec over the final 2 sts.
16 sts
Ch 1 and turn.
Row 10
Dec over the first 2 sts, sc across to the last 2 sts, dec over the final 2 sts.
14 sts
Ch 1 and turn.
Row 11
Sc across.
14 sts
Ch 1 and turn.
Row 12
Dec over the first 2 sts, sc across to the last 2 sts, dec over the final 2 sts.
12 sts
Ch 1 and turn.
Row 13
Sc across.
12 sts
Ch 1 and turn.
Row 14
Dec over the first 2 sts, sc across to the last 2 sts, dec over the final 2 sts.
10 sts
Ch 1 and turn.
Row 15
Dec over the first 2 sts, sc across to the last 2 sts, dec over the final 2 sts.
8 sts
Ch 1 and turn.
Row 16
Sc across.
8 sts
Fasten off.
Weave in the ends.
Repeat the complete tooth panel to make the second piece.
Making the Pocket
The pocket provides a special place for the lost tooth and a small note or surprise from the tooth fairy.
Using your chosen yarn, ch 15.
Pocket Row 1
Sc in the 2nd ch from hook and across.
14 sts
Ch 1 and turn.
Rows 2–8
Sc across.
14 sts
Ch 1 and turn after each row.
Fasten off, leaving a long tail for sewing.
The finished pocket should be approximately 3 x 2 inches, depending on your gauge.
Adding the Pocket
Place the pocket on the lower center portion of one tooth panel.
Use the yarn tail and a tapestry needle to sew the bottom and side edges securely to the tooth.
Leave the top edge open.
Do not sew the pocket closed.
Before finishing the stitching, check that the pocket opening is large enough to comfortably hold a small tooth or note.
Adding the Face
For a simple tooth fairy design, embroider two small eyes and a smiling mouth using black yarn.
Add small pink embroidered cheeks if desired.
Keep all facial details securely stitched to the pillow.
For a child’s item, embroidered details are a better choice than buttons, beads, or other small detachable decorations.
Joining the Tooth Panels
Place the two tooth panels together with their wrong sides facing each other.
Using white yarn, join the panels around the outside edge with single crochet or slip stitches.
Leave an opening at the bottom large enough to add the stuffing.
Work slowly around the curves and corners so the two pieces remain aligned.
Stuffing the Pillow
Add small amounts of fiberfill at a time.
Begin by filling the upper portion of the tooth and then work your way toward the lower section.
Do not overstuff the pillow.
The goal is a soft, lightly padded shape rather than a very firm pillow.
Make sure the stuffing is distributed evenly before closing the opening.
Closing the Pillow
Once the pillow has been stuffed, continue joining the remaining opening.
Fasten off securely.
Weave the yarn tail into the inside of the pillow and trim the excess.
Gently shape the finished tooth with your hands.
Optional Hanging Loop
A hanging loop makes the tooth fairy pillow easy to place on a bedroom door or bedpost.
To make a simple loop, attach yarn at the top of the pillow and chain approximately 15 stitches.
Slip stitch back into the starting point to form a loop.
Fasten off and weave in the ends securely.
Check the loop regularly for signs of wear and repair or remove it if it becomes loose.
Color Ideas
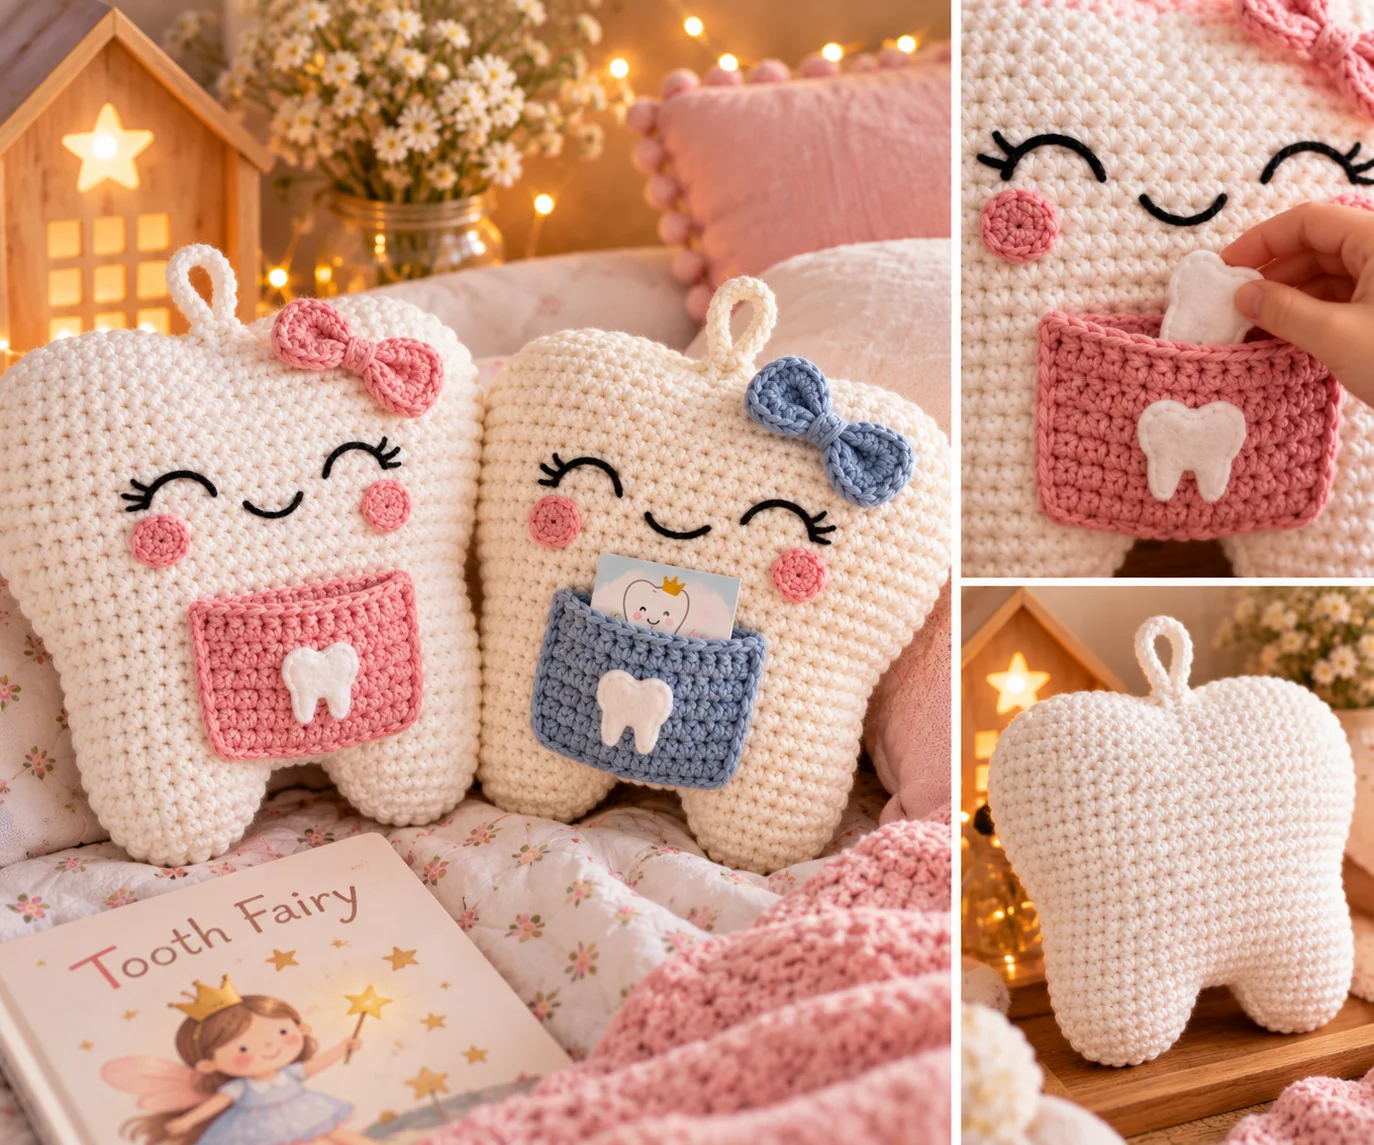
A classic tooth fairy pillow looks beautiful in white or ivory, but you can easily personalize yours.
Classic White
Use white yarn for the entire tooth and add pink cheeks and a black embroidered smile.
Pastel Tooth Fairy
Try white with a pastel pink, lavender, blue, or mint pocket.
Rainbow Pocket
Use colorful scraps to create a striped pocket for a cheerful children’s design.
Personalized Pillow
Embroider the child’s initial or name onto the pocket.
Keep personalization securely embroidered rather than using loose embellishments.
Tips for Making the Tooth Fairy Pillow
Keep the Tension Consistent
Consistent tension will help both tooth panels remain the same size.
If the second panel is noticeably larger or smaller than the first, check your stitch count before joining the pieces.
Count Every Row
The tooth shape depends on increases and decreases.
If you accidentally add or lose stitches, the shape may become uneven.
Counting your stitches at the end of each shaping row can prevent problems later.
Don’t Overstuff
Too much stuffing can distort the tooth shape and make the seams stretch.
Add the fiberfill gradually until the pillow has a soft, rounded shape.
Secure the Pocket
The pocket will be handled frequently, so sew the sides and bottom securely.
Leave the top completely open so the tooth can be removed easily.
Embroider Rather Than Glue
For children’s items, embroidered details are preferable to glued decorations that could loosen over time.
Common Mistakes
The Tooth Looks Too Narrow
Check that you completed the increases at both ends of the widening section.
The Tooth Is Uneven
Compare the two panels before joining them. Uneven tension or missed increases and decreases can cause one side to look different.
The Pocket Is Too Small
If you want the pocket to hold a larger note or small gift, add extra chains at the beginning and additional rows to increase its size.
The Pillow Is Too Firm
Remove a little stuffing until the tooth has a soft, flexible shape.
Customizing the Size
You can make this tooth fairy pillow larger or smaller by changing the foundation chain and adjusting the number of increase and decrease rows.
For a larger pillow, begin with a longer foundation chain and add additional rows during the widening section.
For a smaller pillow, use a shorter foundation chain and fewer shaping rows.
When resizing the tooth, remember to resize the pocket as well so the proportions remain balanced.
Safety Considerations
This project is intended as a decorative keepsake for children.
Use securely embroidered facial features instead of loose buttons, beads, safety eyes, or other small decorations, particularly if the pillow may be accessible to young children.
If you add a hanging loop, inspect it regularly to make sure it remains securely attached.
The pillow is not intended to be used as a sleep aid for infants or as a toy for children who may chew or pull on the components.
Frequently Asked Questions
What yarn is best for a crochet tooth fairy pillow?
Worsted-weight yarn is a practical choice because it creates a sturdy fabric and makes a comfortably sized pillow. Cotton, acrylic, or a cotton blend can be used depending on the intended use.
How big is a crochet tooth fairy pillow?
The finished size varies by pattern. This original pattern produces a pillow approximately 7 x 8 inches.
Other published crochet tooth fairy pillow patterns range from small approximately 6-inch designs to larger pillows around 8 inches or more.
Does a tooth fairy pillow need a pocket?
A pocket is not essential, but it is one of the most useful features. It gives the child a specific place to leave the lost tooth and makes it easier for the tooth fairy to exchange the tooth for a small surprise.
Can I make the pillow without a face?
Yes. A plain tooth-shaped pillow can have a simple, classic appearance without any facial features.
Can I personalize the tooth fairy pillow?
Absolutely. You can embroider a child’s name, initial, birth year, or a short message onto the pocket.
Can I sell finished tooth fairy pillows made from this pattern?
This original pattern is written here for you to use as a project. If you plan to sell finished items commercially, check the terms associated with any additional patterns, artwork, logos, or copyrighted designs you incorporate.
Conclusion
A crochet tooth fairy pillow is a sweet way to turn losing a baby tooth into a special childhood memory. The simple tooth shape is easy to customize, while the small pocket gives the project a practical purpose.
Make the pillow in classic white for a traditional look, or add colorful details to match a child’s room. An embroidered name or initial can make it even more personal.
With basic crochet stitches, a small amount of yarn, and some fiberfill, you can create a keepsake that can be used every time a tooth falls out and treasured long after the tooth fairy years are over.