Low Sew Caterpillar Crochet Amigurumi Free Pattern
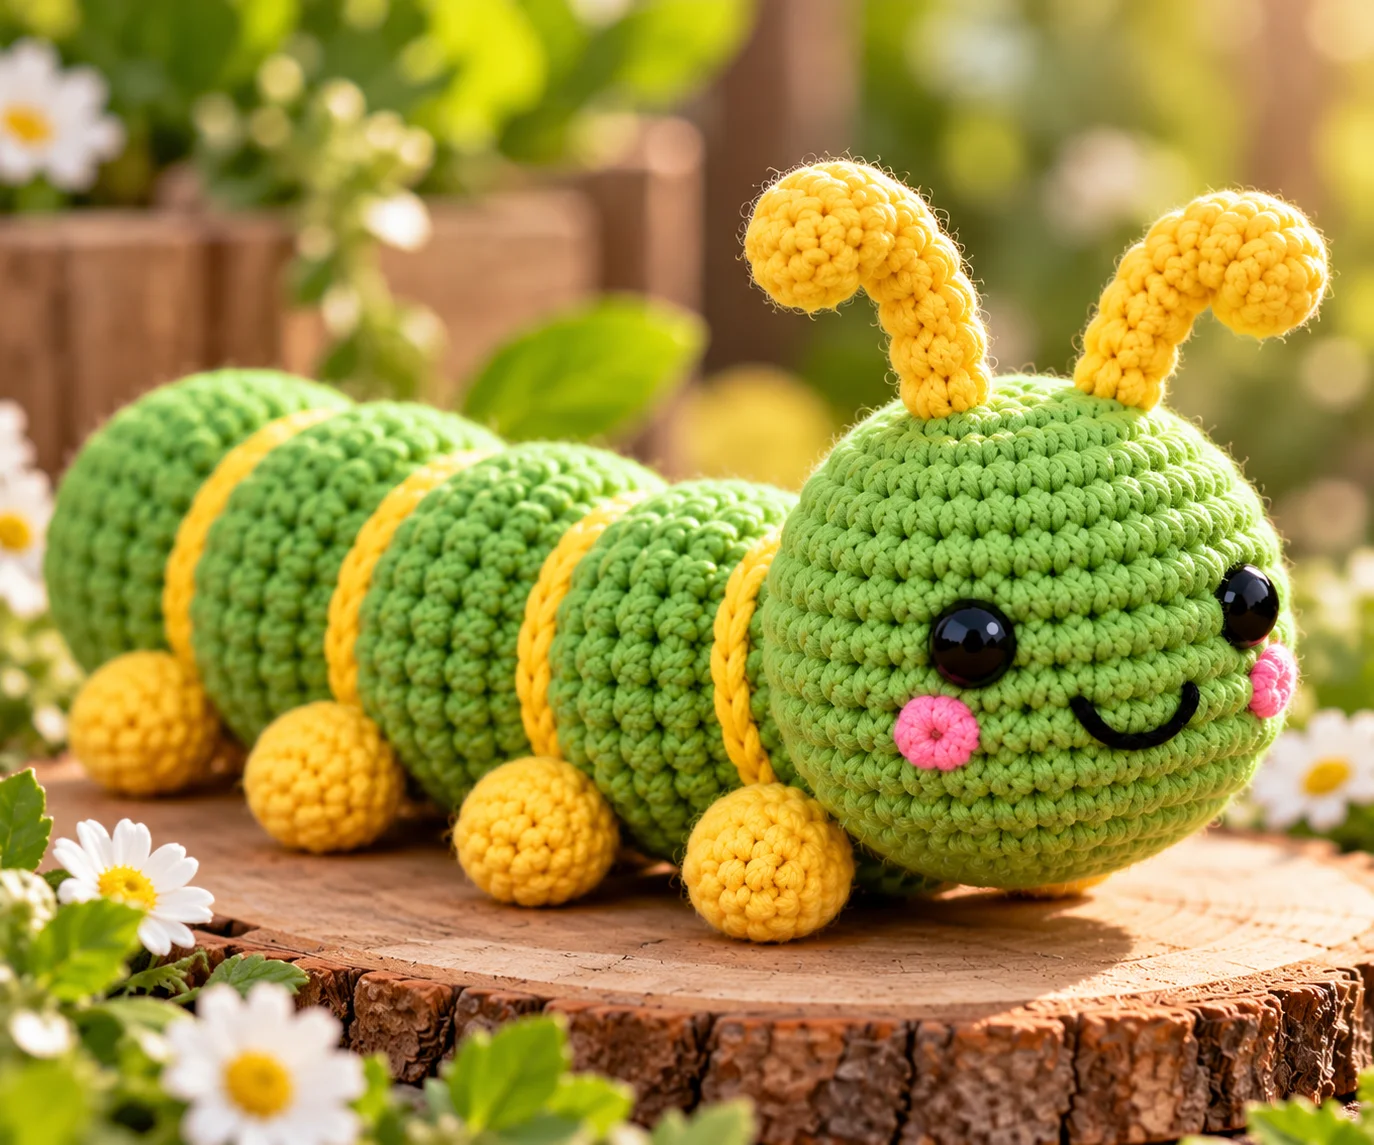
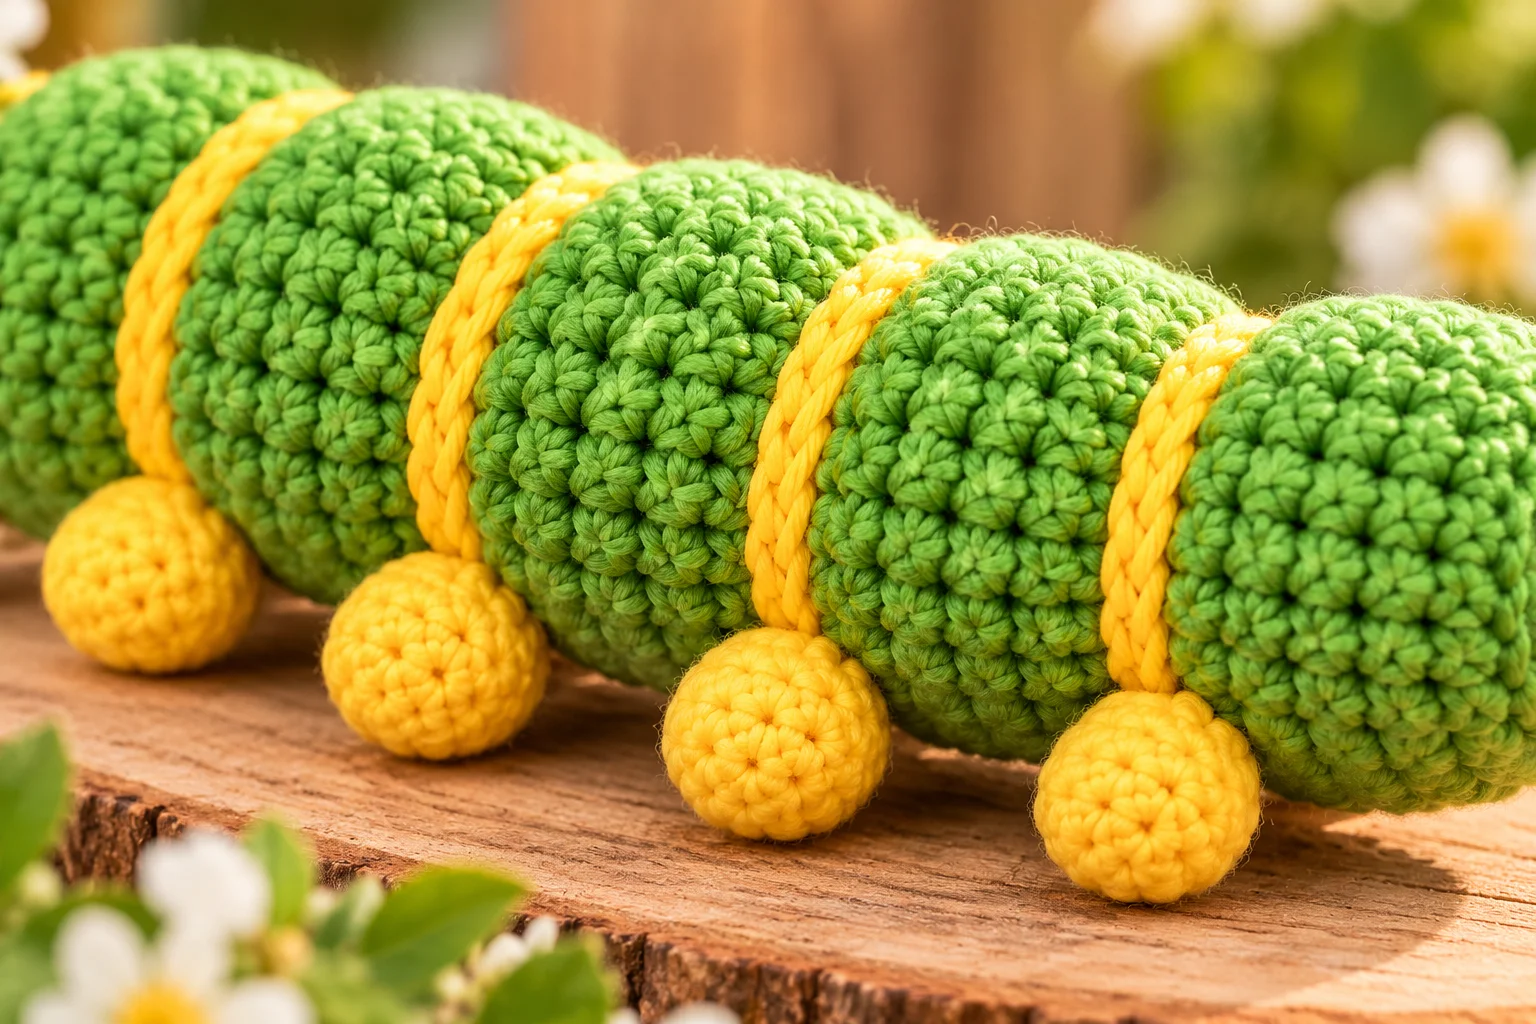
This adorable Low Sew Caterpillar Crochet Amigurumi is a fun little project made with simple crochet stitches and minimal sewing. Instead of making lots of separate body pieces and stitching them together, the caterpillar is built mostly as one continuous crocheted piece.
With its round body, tiny feet, cheerful face, and cute antennae, this little caterpillar makes a sweet handmade toy, desk companion, or woodland-themed decoration.
The pattern is written in US crochet terminology.
Project Overview
- Skill level: Beginner to intermediate
- Construction: Mostly worked as one piece
- Sewing: Minimal
- Finished size: Approximately 5 inches long
- Yarn weight: Worsted weight (#4)
- Hook: 3.5 mm
- Terminology: US crochet terms
Materials
- Green worsted-weight (#4) yarn
- Small amounts of yellow yarn
- Small amount of dark brown or black yarn
- 3.5 mm crochet hook
- Fiberfill stuffing
- Yarn needle
- Scissors
- Stitch marker
Optional:
- 6 mm safety eyes for an older child’s toy
For a baby or toddler toy, embroidered eyes are the safer choice.
Crochet Abbreviations
- ch – chain
- sl st – slip stitch
- sc – single crochet
- inc – increase
- dec – decrease
- st/sts – stitch/stitches
- BLO – back loop only
- FO – fasten off
Special Stitch
Single Crochet Increase
Work 2 sc into the same stitch.
Single Crochet Decrease
Insert the hook into the next stitch and pull up a loop. Insert the hook into the following stitch and pull up another loop. Yarn over and pull through all 3 loops.
Caterpillar Body
The main caterpillar body is crocheted in continuous rounds.
Use green yarn.
Work with a stitch marker to keep track of the beginning of each round.
Round 1
Make a magic ring.
Work 6 sc into the ring.
(6 sts)
Round 2
Inc in each stitch around.
(12 sts)
Round 3
Sc in next st, inc in next st.
Repeat around.
(18 sts)
Round 4
Sc in next 2 sts, inc in next st.
Repeat around.
(24 sts)
Round 5
Sc in next 3 sts, inc in next st.
Repeat around.
(30 sts)
Rounds 6–9
Sc in each stitch around.
(30 sts)
Begin adding small amounts of stuffing as you continue.
Do not overfill the body. The fabric should remain rounded without stretching between the stitches.
Round 10
Sc in next 3 sts, dec.
Repeat around.
(24 sts)
Round 11
Sc in next 2 sts, dec.
Repeat around.
(18 sts)
Add more stuffing if necessary.
Round 12
Sc in next st, dec.
Repeat around.
(12 sts)
Round 13
Dec around.
(6 sts)
Fasten off.
Thread the yarn needle with the remaining tail and close the opening securely.
Weave the yarn tail into the body and trim the excess.
Creating the Caterpillar Segments
To give the caterpillar a cute segmented appearance without sewing separate balls together, use contrasting yarn to add shallow embroidered lines around the body.
Thread a yarn needle with yellow yarn.
Create several short horizontal lines around the body, spacing them evenly.
Do not pull the yarn tightly. The lines should decorate the surface without compressing the stuffing excessively.
For a simpler caterpillar, you can leave the body plain.
Tiny Feet
The feet are crocheted separately, but they require only minimal sewing.
Make 6.
Using yellow yarn:
Round 1
Make a magic ring.
Work 6 sc into the ring.
(6 sts)
Round 2
Sc in each stitch around.
(6 sts)
Fasten off, leaving a sewing tail.
Do not stuff the feet.
Flatten each foot gently between your fingers.
Attaching the Feet
Place three feet along each side of the caterpillar.
Position them approximately evenly along the lower edge.
Using the yarn tails, sew each foot securely to the body.
Make several passes through the attachment point.
Weave in the remaining ends.
Because the feet are small, secure stitching is particularly important.
Caterpillar Head
The head is formed directly onto one end of the body, so there is no separate head to sew on.
Join green yarn to the front end of the body.
Round 1
Work 6 sc evenly around the end of the body.
(6 sts)
Round 2
Inc around.
(12 sts)
Round 3
Sc in next st, inc in next st.
Repeat around.
(18 sts)
Round 4
Sc in next 2 sts, inc in next st.
Repeat around.
(24 sts)
Rounds 5–7
Sc in each stitch around.
(24 sts)
Stuff the head lightly as you work.
Round 8
Sc in next 2 sts, dec.
Repeat around.
(18 sts)
Round 9
Sc in next st, dec.
Repeat around.
(12 sts)
Round 10
Dec around.
(6 sts)
Fasten off and close the opening.
Weave in the end securely.
Adding the Face
Position the face toward the rounded head end.
Embroidered Eyes
For a baby-safe caterpillar, use black yarn to embroider two small eyes.
Make several small stitches in the same area until the eyes are clearly defined.
Secure the yarn firmly inside the head.
Optional Safety Eyes
If making the caterpillar for an older child, safety eyes can be used according to the manufacturer’s instructions.
Do not use safety eyes for toys intended for babies or children who may mouth or chew the toy.
Embroidered Mouth
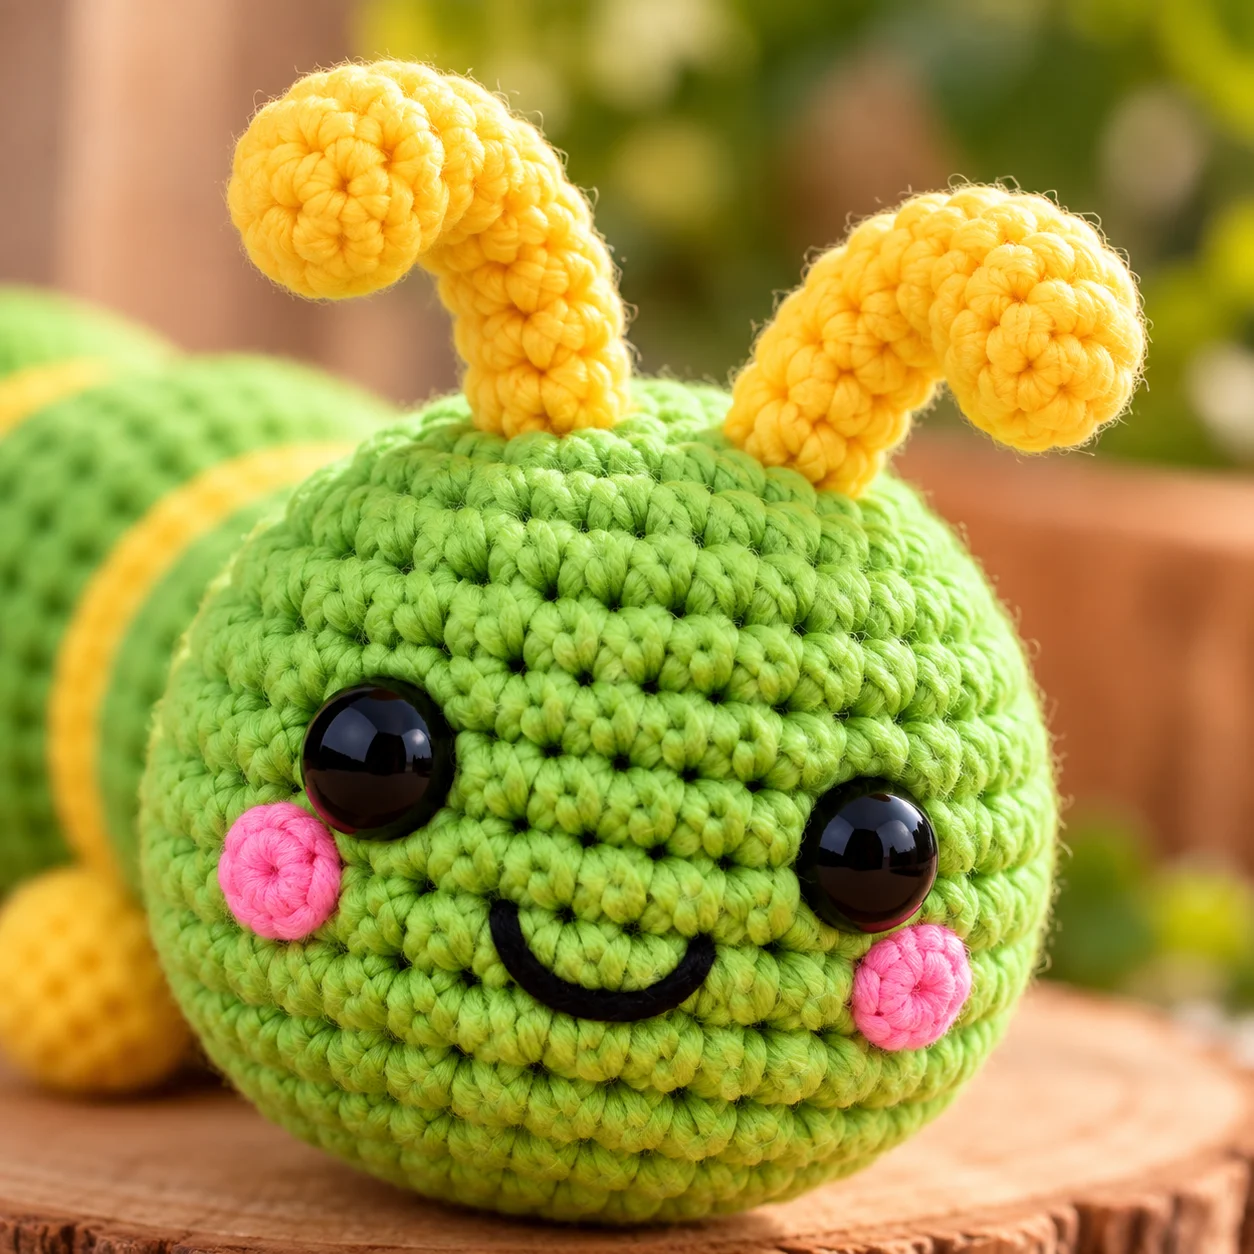
Using black or dark brown yarn, stitch a small curved smile below the eyes.
Keep the mouth simple and securely fastened.
Caterpillar Antennae
Make 2.
Using yellow yarn, ch 7.
Starting in the second chain from the hook, sl st across the chain.
Fasten off, leaving a sewing tail.
Fold the antenna slightly and sew it securely to the top of the head.
Repeat for the second antenna.
For a younger child’s toy, keep the antennae short and firmly attached.
Optional Cheeks
For a sweet expression, add tiny pink embroidered cheeks.
Use only a few stitches on each side of the face.
Secure the yarn inside the head.
Finishing
Check the entire caterpillar carefully.
- Tug gently on each foot.
- Check both antennae.
- Check the eyes and mouth.
- Make sure no stuffing is visible.
- Secure all yarn ends.
The finished caterpillar should feel firm but not rock-hard.
Color Variations
You can create many different caterpillars using the same basic pattern.
Classic Garden Caterpillar
- Green body
- Yellow feet
- Yellow antennae
Rainbow Caterpillar
Change the yarn color every few rounds.
Try:
- Red
- Orange
- Yellow
- Green
- Blue
- Purple
Pastel Caterpillar
Use soft shades of:
- Mint
- Lavender
- Peach
- Pale yellow
- Baby blue
Woodland Caterpillar
Try olive green, mustard yellow, cream, and brown.
Tips for a Better Amigurumi
Keep your stitches tight
Amigurumi generally looks best when the stuffing cannot easily show through the stitches.
If you can see large gaps between your stitches, try a smaller hook.
Stuff gradually
Adding stuffing little by little gives you more control over the shape.
Avoid filling the body so firmly that the stitches stretch apart.
Use a stitch marker
Continuous rounds can be difficult to count without a marker.
Move the marker to the first stitch of every round.
Secure your ends carefully
Amigurumi receives plenty of handling, so yarn tails should be woven securely into the inside.
Common Mistakes
The caterpillar is lumpy
Uneven stuffing can cause bumps. Add small amounts of fiberfill and distribute it with your fingers.
The body is too loose
Your hook may be too large for your yarn. Try a smaller hook.
The head leans sideways
Check that your stitches are evenly spaced when working around the body.
The feet keep coming loose
Sew through several stitches of both the foot and body rather than attaching the foot with only one or two stitches.
Safety
This pattern can be made as a children’s toy, but handmade toys require careful inspection.
For babies and young toddlers, embroidered eyes and facial features are recommended instead of safety eyes, buttons, beads, or other detachable pieces.
Make sure the feet and antennae are securely attached. Loose components can create choking hazards.
Inspect the finished toy regularly for loose stitching, damaged yarn, exposed stuffing, or detached parts.
Never give a damaged handmade toy to a child.
Frequently Asked Questions
Why is this called a low-sew caterpillar?
Most of the caterpillar is crocheted as a continuous piece. Only the small feet and antennae need to be attached separately, which significantly reduces sewing compared with traditional amigurumi construction.
Can I make the caterpillar without sewing?
The feet and antennae could be omitted, but they need to be attached if you want the complete design. The head and main body are designed to minimize separate assembly.
Can I use cotton yarn?
Yes. Cotton yarn creates a firm, defined amigurumi fabric and works particularly well for small crochet toys.
Can I make the caterpillar larger?
Yes. Use a thicker yarn and a larger hook, or add additional increase rounds to enlarge the body. Remember that changing the yarn and hook will also change the amount of stuffing required.
Can I use this pattern for a baby toy?
The design can be adapted for a baby, but use embroidered facial features instead of detachable eyes or other small parts. All attached pieces must be securely stitched and regularly inspected.
Final Thoughts
This Low Sew Caterpillar Crochet Amigurumi is a cheerful little project that keeps assembly to a minimum while still creating a detailed and playful finished toy.
Experiment with bright colors, pastel shades, or rainbow stripes to make your own collection of tiny crochet caterpillars. The simple shape also makes this a fun project for practicing basic amigurumi increases, decreases, stuffing, and secure finishing.