Free Crochet Chicken Pattern – Easy Amigurumi Chicken
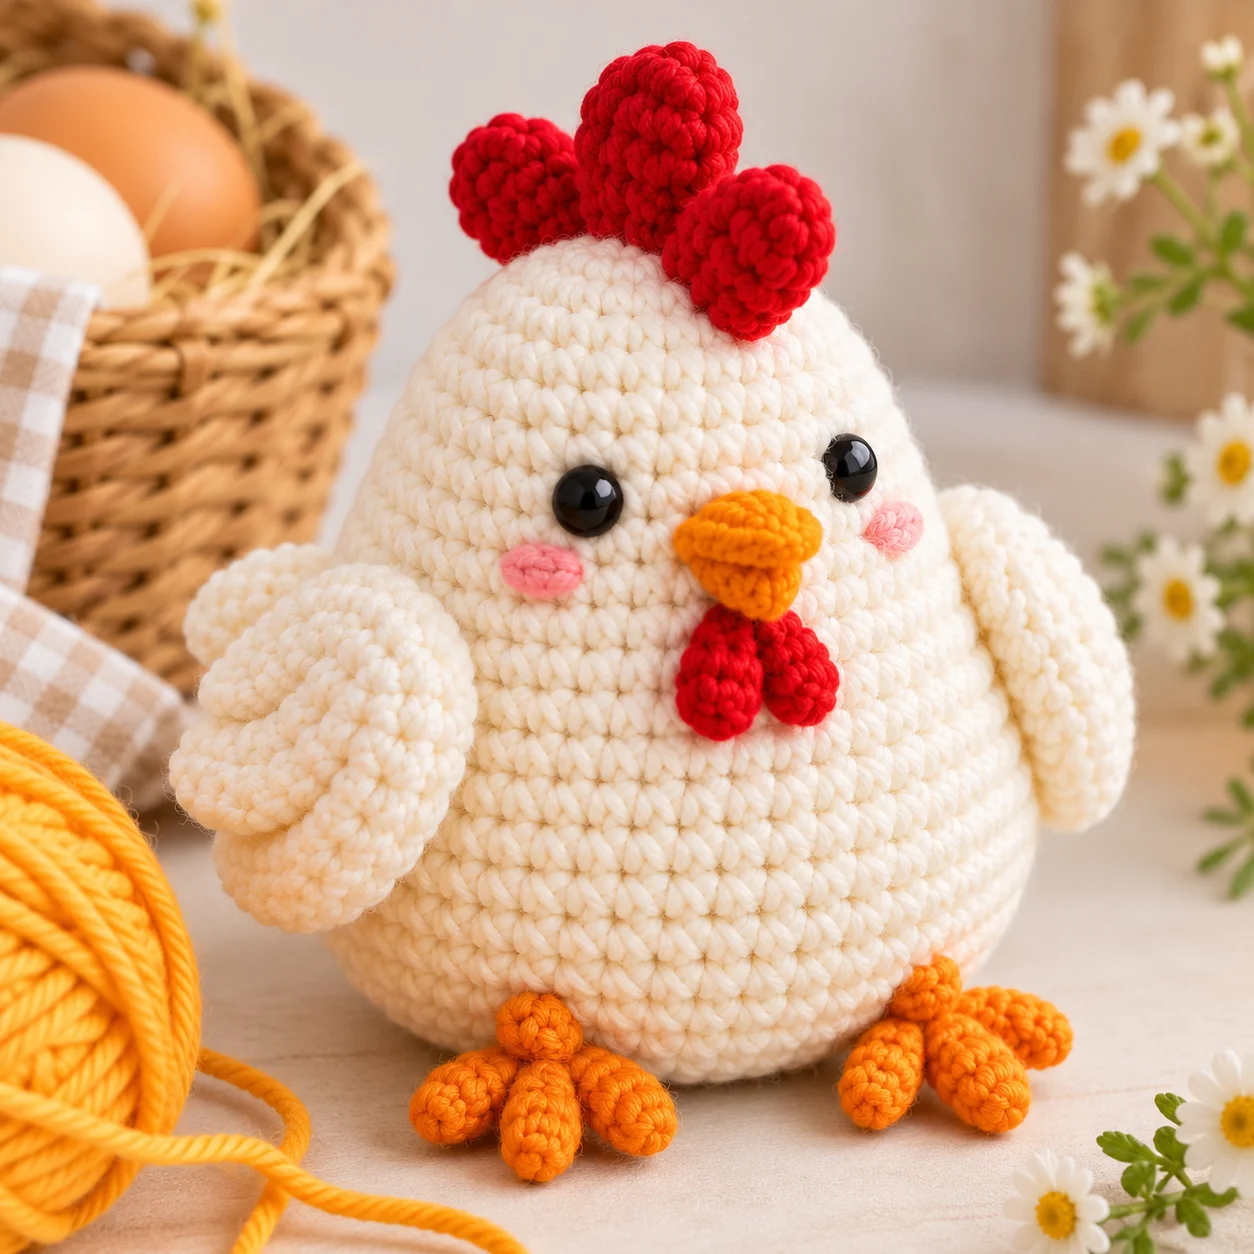
Looking for a cute and easy crochet chicken pattern? This little amigurumi chicken is a fun project for anyone who loves handmade farm animals, cozy decorations, and adorable crochet toys.
With its rounded body, tiny beak, little wings, and red comb, a crochet chicken makes a charming addition to a farmhouse display, spring decoration, Easter basket, or handmade gift collection.
This pattern is designed around a simple, rounded chicken shape worked in continuous rounds. You can use traditional white and yellow colors or experiment with brown, cream, buff, and speckled-looking color combinations.
The instructions below explain the construction and finishing techniques for a small amigurumi chicken. Exact stitch counts, round-by-round shaping, yarn quantities, and finished measurements have not been established for this design, so they are not presented as a fully tested, stitch-counted pattern.
Crochet Chicken Pattern Overview
- Project: Amigurumi chicken
- Skill level: Beginner to intermediate
- Construction: Rounded body with separately made details
- Techniques: Working in the round, single crochet, increases, decreases, and sewing pieces together
- Suggested colors: White or yellow for the body, orange for the beak and feet, and red for the comb
- Uses: Decorations, gifts, and collectible amigurumi
Materials
Prepare the following supplies:
- Medium-weight yarn in white, cream, or yellow
- Small amounts of orange yarn for the beak and feet
- Red yarn for the comb and optional wattle
- Crochet hook suitable for your yarn and tension
- Fiberfill stuffing
- Yarn needle
- Scissors
- Stitch marker
For a smaller, more tightly stitched chicken, you can choose a finer yarn and a correspondingly smaller hook.
If the chicken is intended for a young child, embroidered facial features are preferable to plastic safety eyes, and all parts must be securely attached. Handmade toys are not automatically safe for every age group.
Crochet Abbreviations
This pattern uses US crochet terminology.
- MR: Magic ring
- ch: Chain
- sc: Single crochet
- inc: Increase, working two single crochet stitches into one stitch
- dec: Decrease, combining two stitches into one
- sl st: Slip stitch
- st(s): Stitch(es)
- rnd: Round
- FO: Fasten off
How to Crochet a Chicken
Step 1: Crochet the Body
Choose your main yarn color and begin with a magic ring.
Work single crochet stitches in continuous rounds, increasing gradually to form a rounded shape. Keep track of the beginning of each round with a stitch marker.
Continue working the body at its widest point before introducing decreases to shape the upper portion.
As the opening becomes smaller, add stuffing gradually. Distribute it evenly to prevent lumps and keep the body rounded.
Finish closing the body when the stuffing is in place, leaving a yarn tail if needed for securing the final stitches.
Pattern note: The precise number of increases, even rounds, and decreases must be calculated together to produce a balanced body. Those stitch counts have not been verified here.
Step 2: Make the Wings
Use the same color as the body or choose a contrasting shade.
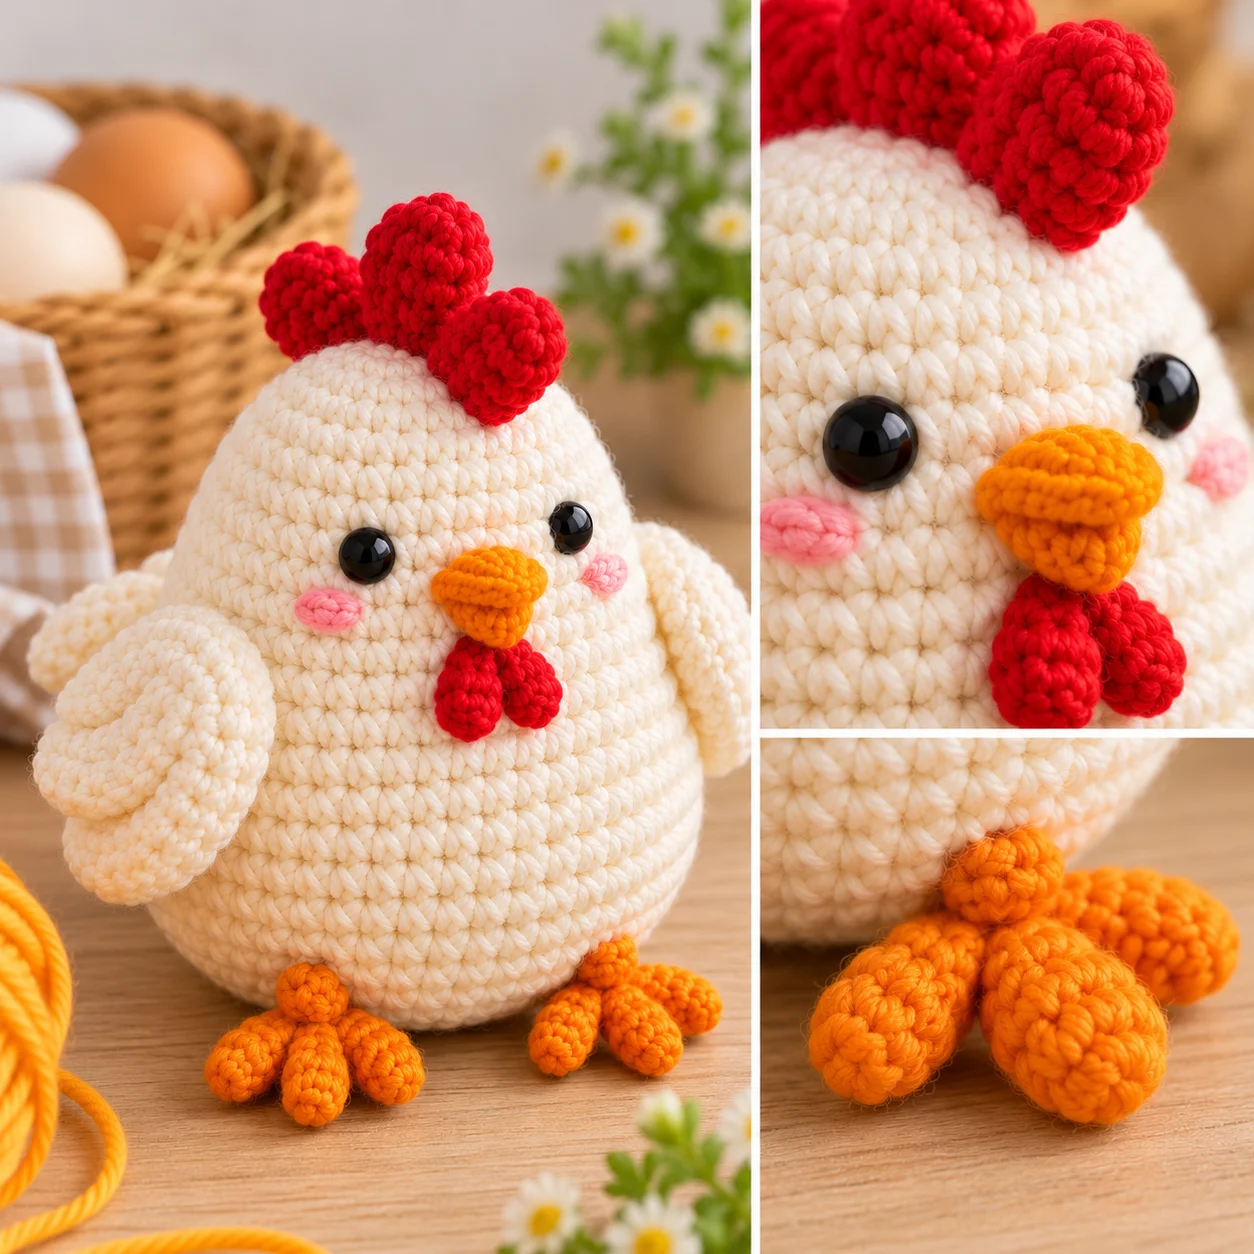
Crochet two small, rounded wing pieces. A simple oval or shallow curved shape works well for a classic chicken design.
Fasten off each wing and leave a sewing tail. Position the wings symmetrically on the sides of the body.
Sew them securely in place, checking that they sit at approximately the same height.
Step 3: Crochet the Comb
The comb is the small red detail on top of the chicken’s head.
Use red yarn to make a short decorative piece with a few rounded bumps. You can shape it with a combination of stitches and small increases, depending on the look you want.
Fasten off and leave a long tail for sewing.
Place the comb at the top of the body, centered between the two sides, and attach it securely.
Step 4: Make the Beak
Use orange yarn for the beak.
Create a small triangular or compact pointed shape. Keep it proportionate to the body so that it does not overwhelm the face.
Fasten off and leave a sewing tail.
Position the beak on the front of the chicken, centered below the eyes.
Step 5: Crochet the Feet
Make two small feet using orange yarn.
For a simple decorative chicken, the feet can be short crocheted shapes or embroidered lines. If you want three-toed feet, form the toes with yarn tails or additional small crocheted details.
Attach the feet near the lower front of the body. Check that both sides look balanced.
For a standing chicken, the shape and placement of the feet must be designed to support the finished toy. A rounded stuffed body alone may not stand upright reliably.
Step 6: Add the Eyes
Use black embroidery thread or black yarn to embroider two small eyes.
Place them symmetrically on either side of the beak. Use small, secure stitches and weave the ends into the body.
For a more playful expression, you can use slightly larger embroidered eyes or add small curved lines above them.
Step 7: Assemble the Chicken
Before sewing every piece permanently, use pins to check the placement of the wings, comb, beak, and feet.
Once you are happy with the arrangement:
- Sew the wings to the sides of the body.
- Attach the comb to the top.
- Sew the beak to the front.
- Attach the feet near the base.
- Secure all yarn ends inside the crochet fabric.
Check that the facial features are centered and the wings are evenly positioned.
Step 8: Finish the Toy
Inspect the chicken for loose stitches, unsecured yarn ends, or gaps in the fabric.
Adjust the stuffing if necessary before closing any remaining openings. Use your yarn needle to weave in the final ends neatly.
Gently shape the body with your hands to create a smooth, rounded appearance.
Customization Ideas
Classic White Chicken
Use white yarn for the body, a red comb, and orange details for a traditional farmyard look.
Yellow Baby Chick
Choose bright yellow yarn and make the wings and body in the same color. A small orange beak adds contrast.
Brown Farm Chicken
Use light brown, tan, or cream yarn for a rustic chicken that suits farmhouse décor.
Easter Chicken
Use pastel yellow, pink, or lavender yarn. Add a small crocheted bow or a decorative flower made from yarn.
Tiny Keychain Chicken
Use finer yarn and a smaller hook to create a miniature version. Make sure the fabric is tight enough to prevent stuffing from showing through.
Tips for a Neat Crochet Chicken
Use a suitable hook size. Amigurumi usually benefits from a firm fabric with minimal gaps between stitches.
Stuff gradually. Adding small amounts of fiberfill at a time helps maintain a smooth shape.
Keep increases and decreases even. Uneven shaping can make the body lopsided.
Check placement before sewing. Temporarily pinning the pieces in place makes it easier to achieve a balanced face and symmetrical wings.
Secure every yarn end. Carefully weave in loose ends to prevent the pieces from unraveling during normal handling.
Safety Considerations
If you are making the chicken as a toy for a baby or young child, use embroidered eyes instead of detachable plastic eyes. Secure the comb, beak, wings, and feet carefully, and avoid small detachable decorations that could present choking hazards.
Crochet fabric, stuffing, and attachments should be selected with the intended age and use in mind. Do not assume a handmade toy is automatically suitable for unsupervised infant use.
Frequently Asked Questions
Is this crochet chicken pattern suitable for beginners?
The basic construction is beginner-friendly if you know single crochet, increases, decreases, and sewing crochet pieces together. Beginners may find the rounded body and small details easier with a stitch marker and careful counting.
What yarn is best for a crochet chicken?
Cotton and acrylic yarn are both useful options. Cotton provides clear stitch definition, while acrylic yarn is widely available in a broad range of colors.
Can I make a chicken without sewing the wings?
Yes, depending on your preferred construction. You can crochet small details directly onto the body, although separately made wings are often easier to position symmetrically.
Why does my amigurumi chicken look uneven?
Uneven increases, inconsistent tension, or poorly positioned details can affect the shape. Check your stitch counts, use a stitch marker, and position the facial features before sewing them permanently.
Can I make a larger chicken?
Yes. A larger hook and thicker yarn can increase the finished size, but the stuffing, proportions, and attachment methods may also need adjustment.
Can I sell chickens made from this pattern?
You should check the permissions and terms associated with any pattern you use. If you develop and test your own original design, establish clear terms for finished-item sales and pattern distribution.
Conclusion
A crochet chicken is a charming amigurumi project that can be customized with different colors, facial expressions, and decorative details. Its rounded body and small features make it suitable for spring decorations, farmhouse displays, and handmade gifts.
Take your time with the shaping, keep the stitches consistent, and attach each detail securely for a polished finish.
For a truly ready-to-follow free pattern, the body, wings, comb, beak, and feet still need complete round-by-round instructions with verified stitch counts. This guide provides the construction approach without inventing measurements or stitch totals that have not been tested.