Best 5 Free Crochet Mushroom Patterns
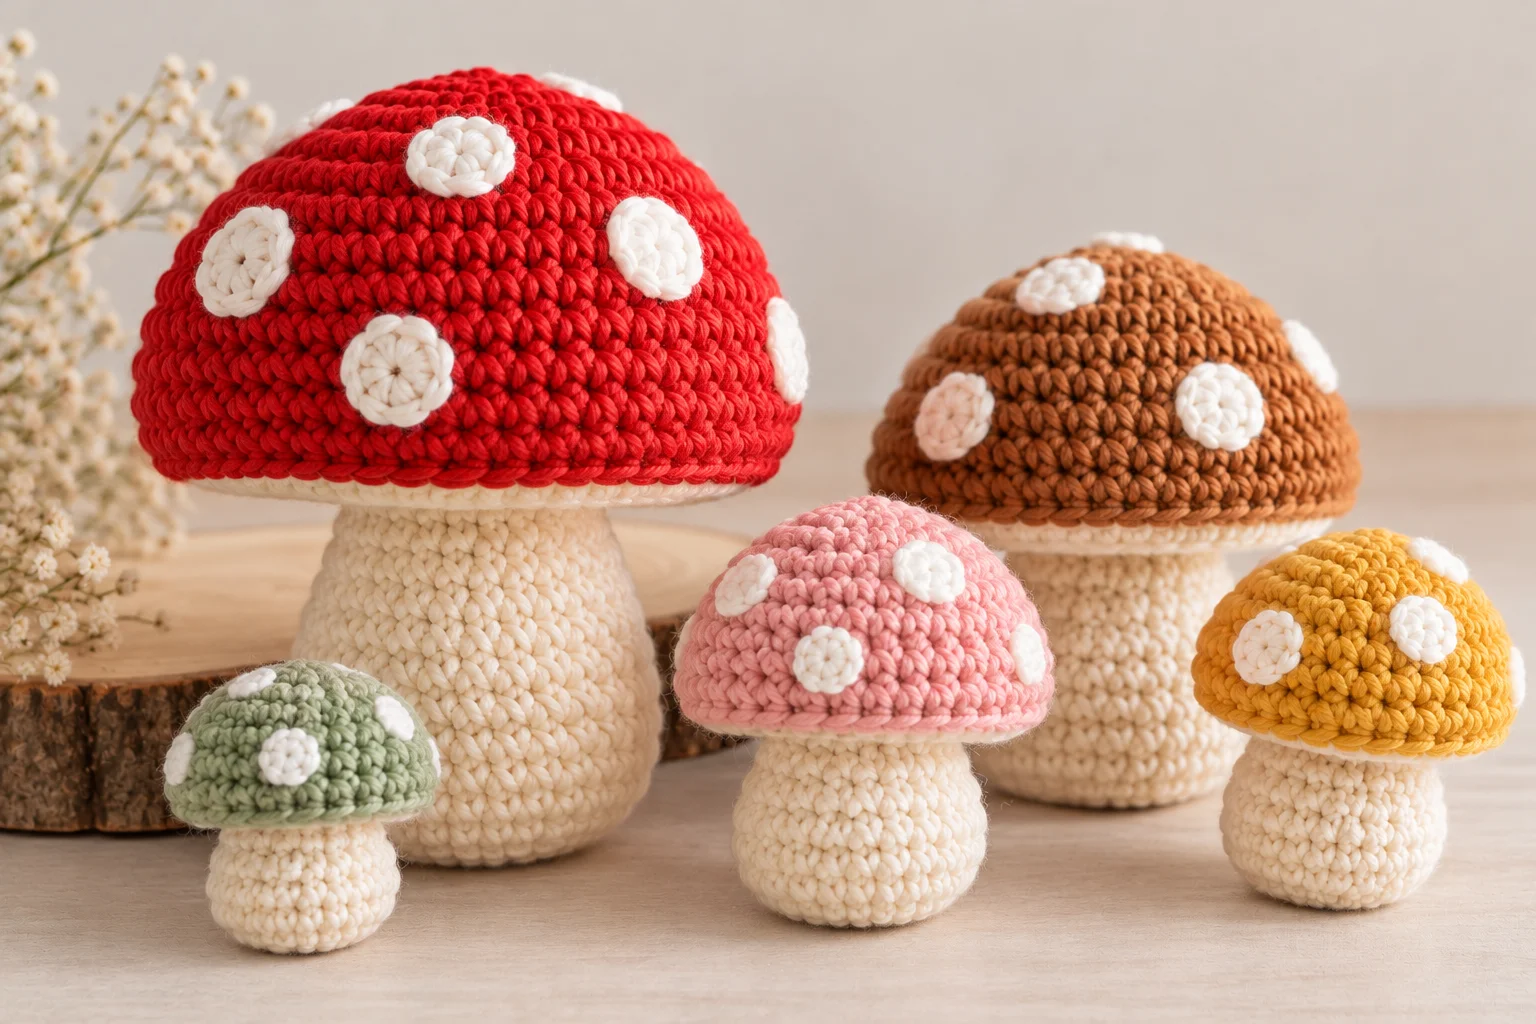
Crochet mushrooms are adorable little projects that bring a touch of woodland magic to your handmade creations. With their rounded caps, tiny stems, and playful colors, these charming designs are perfect for decorating your home, creating handmade gifts, or adding a whimsical touch to your crochet collection.
One of the best things about crocheting mushrooms is their versatility. You can make tiny mushrooms for keychains, soft stuffed mushrooms for shelf decorations, flat appliqués for bags and blankets, or a collection of colorful toadstools for a cottagecore-inspired display.
Many crochet mushroom designs use basic stitches and simple shaping, making them suitable for beginners who want to practice working in the round. More detailed designs offer opportunities to experiment with color changes, textured stitches, and decorative spots.
In this guide, you’ll discover five creative free crochet mushroom pattern ideas, along with tips for choosing yarn, selecting the right project, and achieving a neat finish.
1. Classic Crochet Mushroom Amigurumi
A classic crochet mushroom is a wonderful starting point for anyone who loves traditional woodland decorations. Its rounded red cap, cream-colored stem, and small white spots create the familiar toadstool appearance that makes these projects so appealing.
This style works beautifully as a small decorative figure for a desk, bookshelf, craft room, or seasonal display. You can also experiment with different cap colors to create a collection of mushrooms in complementary shades.
Project details
- Skill level: Beginner to intermediate
- Yarn: Worsted-weight yarn or another suitable weight specified by the pattern
- Main techniques: Single crochet, increases, decreases, and working in the round
- Best for: Woodland decorations, handmade gifts, and amigurumi collections
Why You’ll Love This Pattern
The simple shape makes this mushroom easy to customize. Use red yarn for a traditional look, brown for a natural woodland style, or pastel shades for a softer decorative piece.
You can make the cap and stem separately and join them during assembly. Small embroidered spots add the finishing touch.
Helpful tip: Keep your stitches tight enough to prevent stuffing from showing through the fabric, and add stuffing gradually to maintain the mushroom’s rounded shape.
2. Tiny Crochet Mushroom Buddy
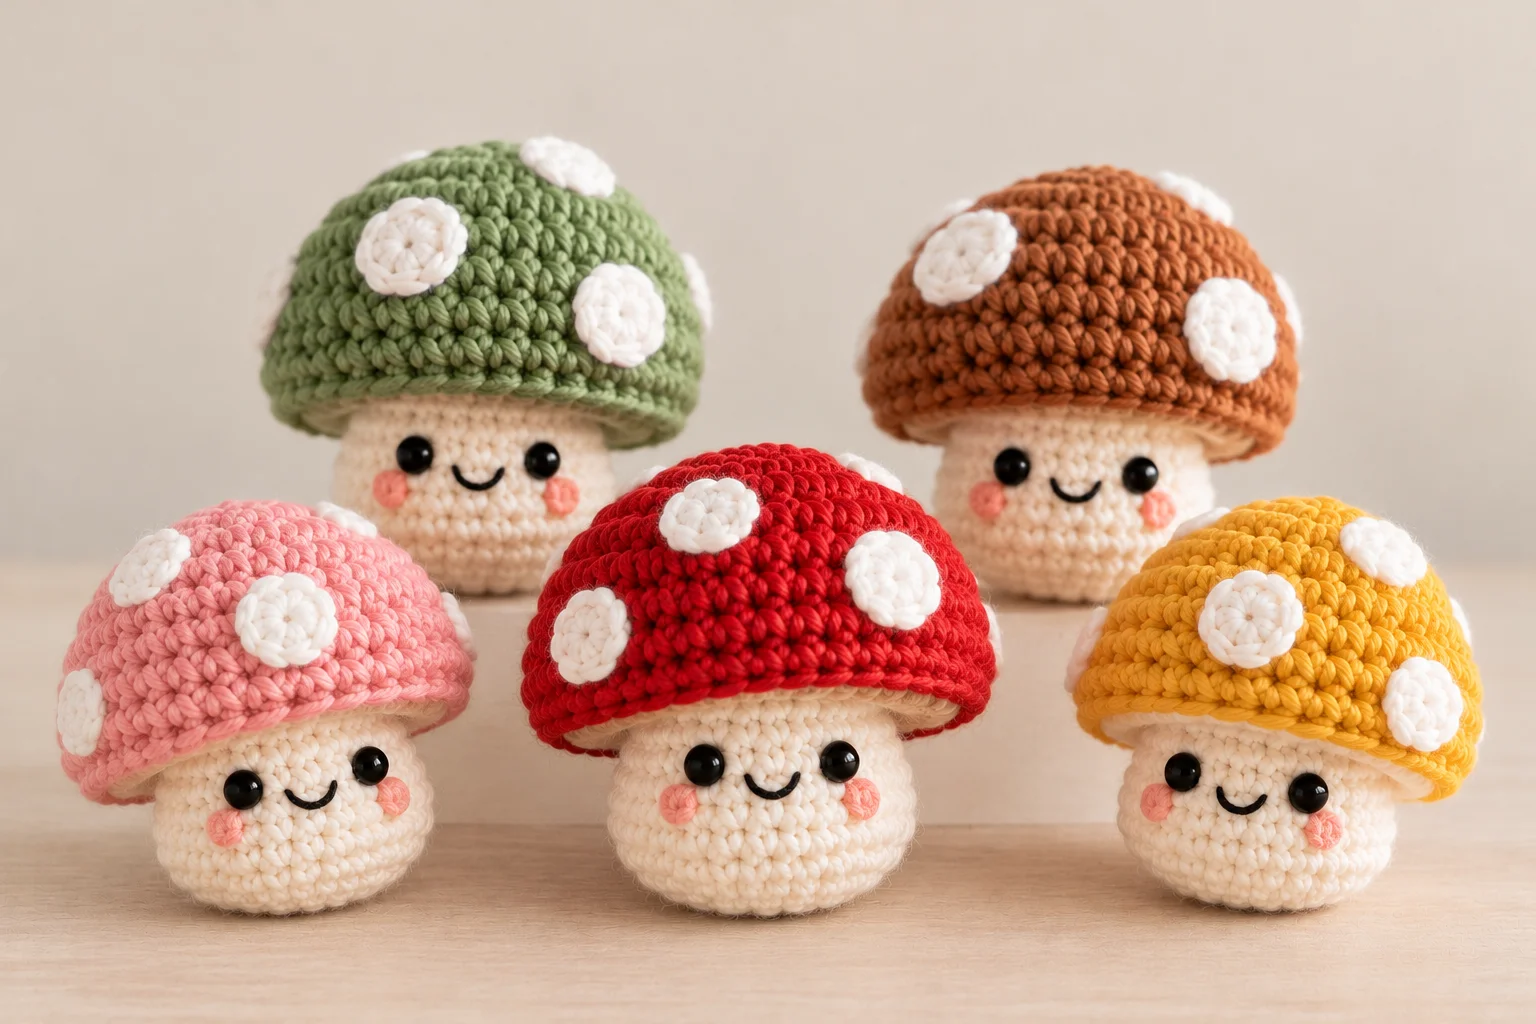
If you prefer small crochet projects, a tiny mushroom buddy is an excellent choice. These miniature mushrooms have a playful appearance and can be made in a variety of colors.
Their compact size makes them suitable for using leftover yarn from larger projects. Depending on the design, you can also add an embroidered face or simple decorative details to give each mushroom its own personality.
Project details
- Skill level: Beginner-friendly
- Yarn: DK or worsted-weight yarn, depending on the desired size
- Main techniques: Single crochet, increases, decreases, and simple assembly
- Best for: Small gifts, desk decorations, and crochet collections
What Makes This Project Special?
Small amigurumi projects are useful for practicing the basic skills needed for larger stuffed toys. You can learn how to maintain even tension, shape a rounded cap, and attach the stem neatly.
Make several mushrooms using different colors to create a cheerful little woodland family.
Helpful tip: If you want a miniature mushroom, use thinner yarn and an appropriately sized hook. The finished dimensions will depend on your materials and tension.
3. Woodland Crochet Mushroom
A woodland crochet mushroom is perfect for anyone who loves rustic, nature-inspired crafts. Instead of the traditional bright red cap, this style uses earthy colors such as rust, chocolate brown, mustard, cream, and forest green.
These mushrooms look lovely when displayed alongside crocheted leaves, acorns, flowers, and other woodland-inspired decorations.
Project details
- Skill level: Beginner to intermediate
- Yarn: DK or worsted-weight yarn, depending on the pattern
- Main techniques: Working in the round, shaping, and joining pieces
- Best for: Autumn decorations, cottagecore displays, and handmade gifts
Ideas for a Natural Woodland Look
Choose a muted color palette and combine different cap shapes to create variety. A wide, rounded cap gives the mushroom a traditional appearance, while a slightly pointed or irregular cap creates a whimsical forest-inspired effect.
You can also make mushrooms in several sizes and arrange them together on a shelf or table.
Helpful tip: If you’re creating a decorative collection, keep the colors coordinated while varying the cap sizes and proportions.
4. Crochet Mushroom Appliqué
A crochet mushroom appliqué is a flat motif that can be attached to another handmade item. Unlike a stuffed mushroom, an appliqué requires little yarn and can be a quick project for practicing basic stitches.
This design is particularly useful when you want to personalize accessories or add a woodland theme to an existing crochet project.
Project details
- Skill level: Beginner-friendly
- Yarn: Cotton or another yarn suitable for the intended project
- Main techniques: Chains, single crochet, double crochet, and simple shaping
- Best for: Blankets, bags, hats, cushions, and decorative panels
Creative Ways to Use Mushroom Appliqués
You can attach a mushroom to a crochet tote bag, add several motifs to a blanket, or arrange mushrooms with flowers and leaves on a decorative panel.
Try using a cream stem with a contrasting cap, or experiment with several colors for a playful design.
For a more delicate appearance, choose thinner yarn. For a bold motif that stands out on a bag or blanket, use a heavier yarn that complements the base fabric.
Helpful tip: Arrange the appliqués before sewing them in place so you can check the spacing and overall design.
5. Crochet Mushroom Trio
Why make just one mushroom when you can create an entire mushroom family? A crochet mushroom trio is a charming way to display several coordinating designs together.
The mushrooms can share the same colors while varying in size, or each one can have a different cap color and shape. This creates a decorative arrangement that feels more natural and visually interesting.
Project details
- Skill level: Beginner to intermediate
- Yarn: Worsted-weight or DK yarn, depending on the desired dimensions
- Main techniques: Single crochet, increases, decreases, stuffing, and assembly
- Best for: Shelf decorations, seasonal displays, and handmade gift sets
How to Create a Coordinated Mushroom Set
Start with a main color palette, such as rust, cream, and brown. Make one larger mushroom and two smaller ones, adjusting your yarn and hook as appropriate for the desired proportions.
You can also add embroidered spots, tiny flowers, or simple leaf details to distinguish each mushroom.
Arrange the finished pieces together on a shelf, craft table, or decorative tray for a cozy woodland display.
Helpful tip: Keep the stuffing and stitch tension consistent across the set so all the mushrooms have a similar texture and finish.
Materials for Crochet Mushroom Projects
Most crochet mushroom patterns require only a few basic supplies. The exact materials depend on whether you’re making a stuffed figure or a flat appliqué.
Yarn
Choose yarn in colors that suit your design. Popular mushroom shades include:
- Red and cream for classic toadstools
- Brown and beige for natural woodland mushrooms
- Rust and mustard for autumn-inspired decorations
- Pink and lavender for whimsical designs
- Green and cream for a forest-inspired color scheme
Cotton yarn provides clear stitch definition, while acrylic yarn is another versatile option for decorative projects.
Crochet Hook
Choose a hook appropriate for your yarn and the pattern’s instructions. For stuffed mushrooms, a slightly smaller hook may help create a dense fabric, provided you can work comfortably and maintain even stitches.
Fiberfill Stuffing
Stuffing is useful for three-dimensional mushrooms. Add it gradually to help maintain a smooth cap and evenly shaped stem.
Tapestry Needle
Use a tapestry needle to sew pieces together, attach decorative elements, and weave in yarn ends.
Scissors and Stitch Markers
Scissors help you trim yarn neatly, while stitch markers are useful for identifying the beginning of a round when working in continuous spirals.
Tips for Crocheting Beautiful Mushrooms
Maintain Even Tension
Consistent stitches help create a smooth surface and an attractive shape. If your tension changes frequently, the cap may appear uneven or the stem may twist.
Count Your Stitches
Count stitches at the end of important rounds, especially when increasing or decreasing. This helps keep the cap and stem symmetrical.
Stuff the Mushroom Gradually
For amigurumi, add small amounts of stuffing at a time. Too much stuffing can stretch the stitches, while too little may cause the mushroom to lose its shape.
Choose Complementary Colors
A contrasting cap and stem make the mushroom easy to recognize. You can also use subtle color changes for a more natural appearance.
Secure the Assembly
Sew the cap and stem together firmly and weave in all yarn ends. Check the finished piece for loose seams before displaying or gifting it.
Experiment with Different Sizes
Changing the yarn weight and hook size can produce mushrooms in different dimensions. Always make sure the hook creates a suitable fabric for the intended project.
Common Mistakes to Avoid
Using a hook that is too large: Loose stitches can allow stuffing to show through a stuffed mushroom.
Adding too much stuffing: Overstuffing can distort the cap and stretch the stitches.
Forgetting stitch counts: Missed increases or decreases can change the mushroom’s shape.
Joining pieces unevenly: Take time to center the stem beneath the cap before sewing the pieces together.
Leaving loose yarn ends: Secure the ends properly to prevent unraveling.
Choosing colors without planning: Test your color combinations before crocheting several mushrooms so the finished collection looks coordinated.
Crochet Mushroom Safety
If you’re making mushrooms as toys for young children, embroider facial features rather than using detachable eyes or other small accessories. Secure all seams and avoid decorations that could detach and create a choking hazard.
Small crocheted mushrooms can also pose a choking risk if placed in a young child’s mouth. Keep miniature decorations out of reach of children who may swallow them.
Frequently Asked Questions
Are crochet mushrooms easy to make?
Many crochet mushroom patterns are beginner-friendly because they use basic stitches and simple shapes. Small stuffed mushrooms and flat appliqués are good projects for learning the fundamentals.
What is the best yarn for crochet mushrooms?
Worsted-weight yarn is a versatile option for medium-sized amigurumi. DK yarn is useful for smaller mushrooms, while cotton yarn can provide clear stitch definition for decorative motifs.
How do I crochet a mushroom cap?
A typical mushroom cap begins with a small circle worked in the round. Increases widen the circle, and additional rounds create the desired depth and shape. The exact instructions depend on the pattern.
Can I make crochet mushrooms without stuffing?
Yes. Flat mushroom appliqués do not require stuffing and can be attached to blankets, bags, hats, and other crochet projects.
What colors work best for crochet mushrooms?
Red and cream create a classic toadstool look. Brown, beige, rust, and mustard are excellent for woodland styles, while pastel colors create a more whimsical appearance.
Can I sell finished crochet mushrooms?
You may be able to sell finished items made from a pattern, depending on the designer’s terms. Check the relevant permissions and avoid copying or redistributing another designer’s written pattern.
Conclusion
These five crochet mushroom styles offer plenty of inspiration for creating charming woodland decorations and handmade gifts. From a classic spotted toadstool and a tiny mushroom buddy to a flat appliqué and a coordinated mushroom trio, there’s a design to suit different preferences and skill levels.
Start with a simple shape, choose yarn colors you love, and practice maintaining even stitches as you work. Once you’re comfortable with the basic construction, experiment with different cap shapes, decorative spots, and woodland color palettes to create your own collection of adorable crochet mushrooms.