Baby and Toddler Hoodie Free Crochet Pattern
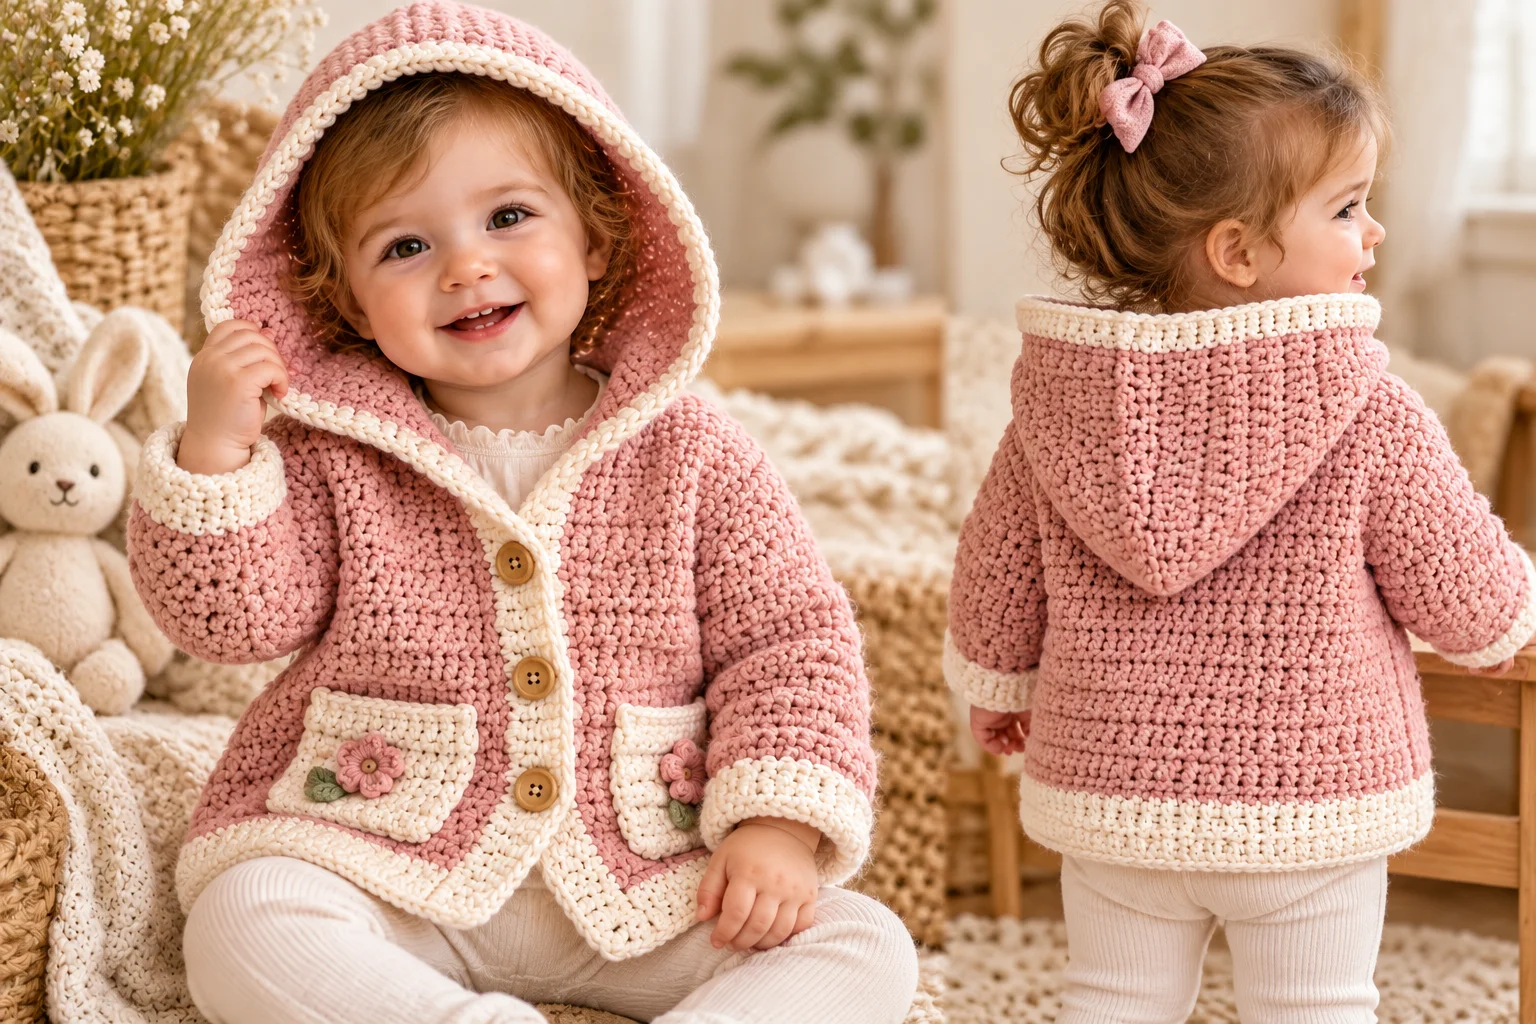
A handmade hoodie is a practical crochet project for little ones. It keeps babies and toddlers cozy while adding a sweet handmade touch to their wardrobe.
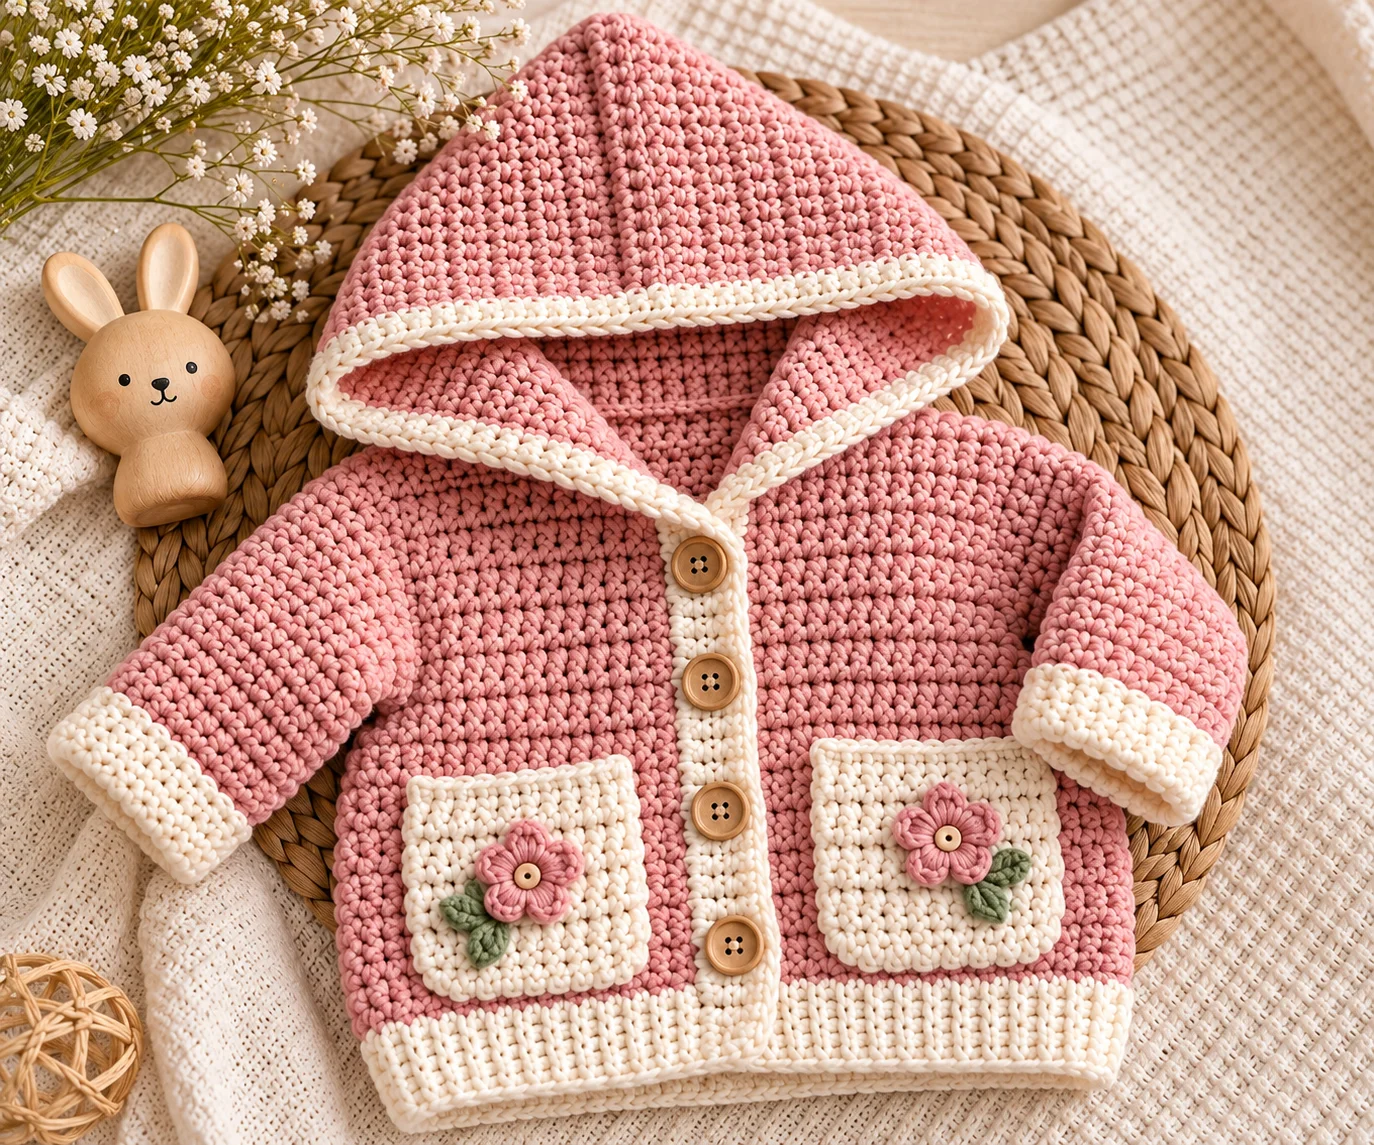
This baby and toddler hoodie crochet pattern is designed as a comfortable layering piece that can be customized with different yarn colors and simple details. It can be made in a single color for a classic look or worked in contrasting colors for a more playful finish.
Before beginning, check the finished measurements against the child’s measurements. Babies and toddlers grow quickly, and crochet fabric can vary considerably depending on yarn, hook size, and tension.
Baby and Toddler Hoodie Overview
This hoodie is constructed from crochet pieces that are joined together before the hood and finishing details are added.
The basic construction makes it easier to adjust the length and overall fit. You can also customize the colors, edging, and optional decorative details.
Skill level: Easy to intermediate
Project type: Baby and toddler clothing
Construction: Crocheted body with a separate hood
Crochet terminology: US terms
Materials
You will need:
- Worsted-weight yarn suitable for children’s clothing
- Crochet hook appropriate for your yarn and tension
- Yarn needle
- Stitch markers
- Scissors
- Measuring tape
Choose a soft, washable yarn intended for garments. Avoid scratchy fibers, particularly for babies and toddlers.
How Much Yarn Do You Need?
Yarn requirements depend on the size, yarn weight, hook, gauge, and finished length.
Because those factors can change the amount needed considerably, check your gauge and purchase enough yarn to complete the chosen size.
Crochet Abbreviations
This pattern uses US crochet terminology.
- ch – chain
- sc – single crochet
- hdc – half double crochet
- dc – double crochet
- sl st – slip stitch
- st/sts – stitch/stitches
- sk – skip
- rep – repeat
- inc – increase
- dec – decrease
Gauge
Gauge is important when making a crochet garment because it determines the finished measurements.
Work a small swatch using the stitch pattern specified for your hoodie. Measure both the stitch gauge and row gauge before beginning the garment.
If your swatch is larger than the required gauge, try a smaller hook. If it is smaller, try a larger hook.
Do not rely only on the hook size printed on the yarn label. Your individual crochet tension determines the final gauge.
Finished Size
For baby and toddler garments, it is better to choose the size based on the child’s actual measurements rather than age alone.
Useful measurements include:
- Chest circumference
- Shoulder-to-shoulder width
- Sleeve length
- Arm circumference
- Body length
- Head circumference
Children of the same age can have very different body measurements, so measuring the intended wearer is the safest way to choose a size.
Baby and Toddler Hoodie Pattern
Step 1: Make a Foundation Chain
Begin with a foundation chain appropriate for the size you are making.
The foundation chain should correspond to the width of the garment section you are crocheting.
Avoid making the chain excessively tight. A tight foundation chain can pull the bottom edge inward and affect the finished shape.
Step 2: Crochet the Body
Work your chosen main stitch evenly across the foundation chain.
Continue working rows until the body reaches the desired length.
At the end of each row, chain the appropriate turning chain and turn your work.
Keep your edges as straight as possible. Counting the stitches at the end of each row can help prevent accidental increases or decreases.
Body Rows
Work the established stitch pattern across the row.
Continue repeating the row until the body reaches the required length for the size you are making.
Keep the stitch count consistent unless the pattern specifically calls for shaping.
Step 3: Shape the Armholes
Once the body reaches the appropriate length, shape the upper portion for the armholes.
The exact number of stitches skipped or worked depends on the size and gauge.
Work the first shoulder section, leave the required center stitches unworked, and continue across the remaining stitches.
Repeat for the opposite side.
The armhole shaping should be symmetrical.
Step 4: Finish the Shoulders
Continue working the shoulder sections until they reach the required height.
Fasten off and weave in the ends.
Repeat the process for the second shoulder.
Before joining the shoulders, place the pieces flat and check that they are symmetrical.
Step 5: Join the Shoulders
Place the front and back pieces together with the correct sides facing.
Use a yarn needle or crochet slip stitches to join the shoulder seams.
Do not pull the seam excessively tight. A little flexibility is useful in a child’s garment.
Making the Sleeves
The sleeves can be worked separately and attached to the body, or worked directly around the armhole depending on the construction you prefer.
For a straightforward construction, make each sleeve separately.
Sleeve Row 1
Work the foundation chain according to the desired sleeve width.
Work the established stitch pattern across the chain.
Sleeve Rows
Continue working in rows until the sleeve reaches the desired length.
For a toddler hoodie, compare the sleeve length against the child’s arm rather than relying only on age-based sizing.
A slightly longer cuff can also allow some room for growth.
Sleeve Shaping
If the pattern calls for tapered sleeves, decrease gradually toward the wrist.
Keep both sleeves identical by recording the number of decreases and rows used on the first sleeve before crocheting the second.
Attach the Sleeves
Fold each sleeve so that the seam is aligned.
Join the sleeve seam, then position the sleeve inside the armhole.
Attach it evenly around the armhole opening.
Repeat for the second sleeve.
Making the Hood
The hood is one of the defining features of this crochet garment.
There are several ways to construct a crochet hood. One simple method is to crochet a rectangular or slightly shaped piece and join it along the top.
Hood
Attach the yarn around the neckline.
Work evenly around the neckline using the established stitch pattern.
Continue working rows until the hood reaches the desired height.
Keep the center back aligned with the center of the garment.
Shape the Top of the Hood
Fold the hood in half so that the two sides meet.
Join the top edge using a yarn needle or slip stitches.
Work carefully so the seam remains straight.
Turn the hood right side out and check the shape.
Hood Edging
Once the hood is attached, work a finishing round around the front opening.
A simple single crochet edging creates a clean border.
Work evenly around the opening, being careful not to add too many stitches.
If the edging begins to ripple, you may have added too many stitches. If it pulls inward, you may need more stitches.
Optional Drawstring
A drawstring can be added to some hoodie designs, but drawstrings around the neck area can present a strangulation or entanglement hazard for young children.
For baby and toddler clothing, avoid neck drawstrings and other loose cords unless the garment is specifically designed and tested for the intended age group and safety requirements.
A simple fixed hood without a drawstring is a safer design choice.
Finishing the Hoodie
After all major pieces are joined:
- Check every seam.
- Weave in loose yarn ends securely.
- Trim excess yarn.
- Check the hood opening.
- Check the sleeve cuffs.
- Gently block the garment if the yarn and pattern allow it.
- Check the entire garment for loose components before use.
Do not leave long yarn tails inside the garment.
Customizing Your Crochet Hoodie
One of the best things about making a child’s hoodie yourself is the ability to customize it.
Use Two Colors
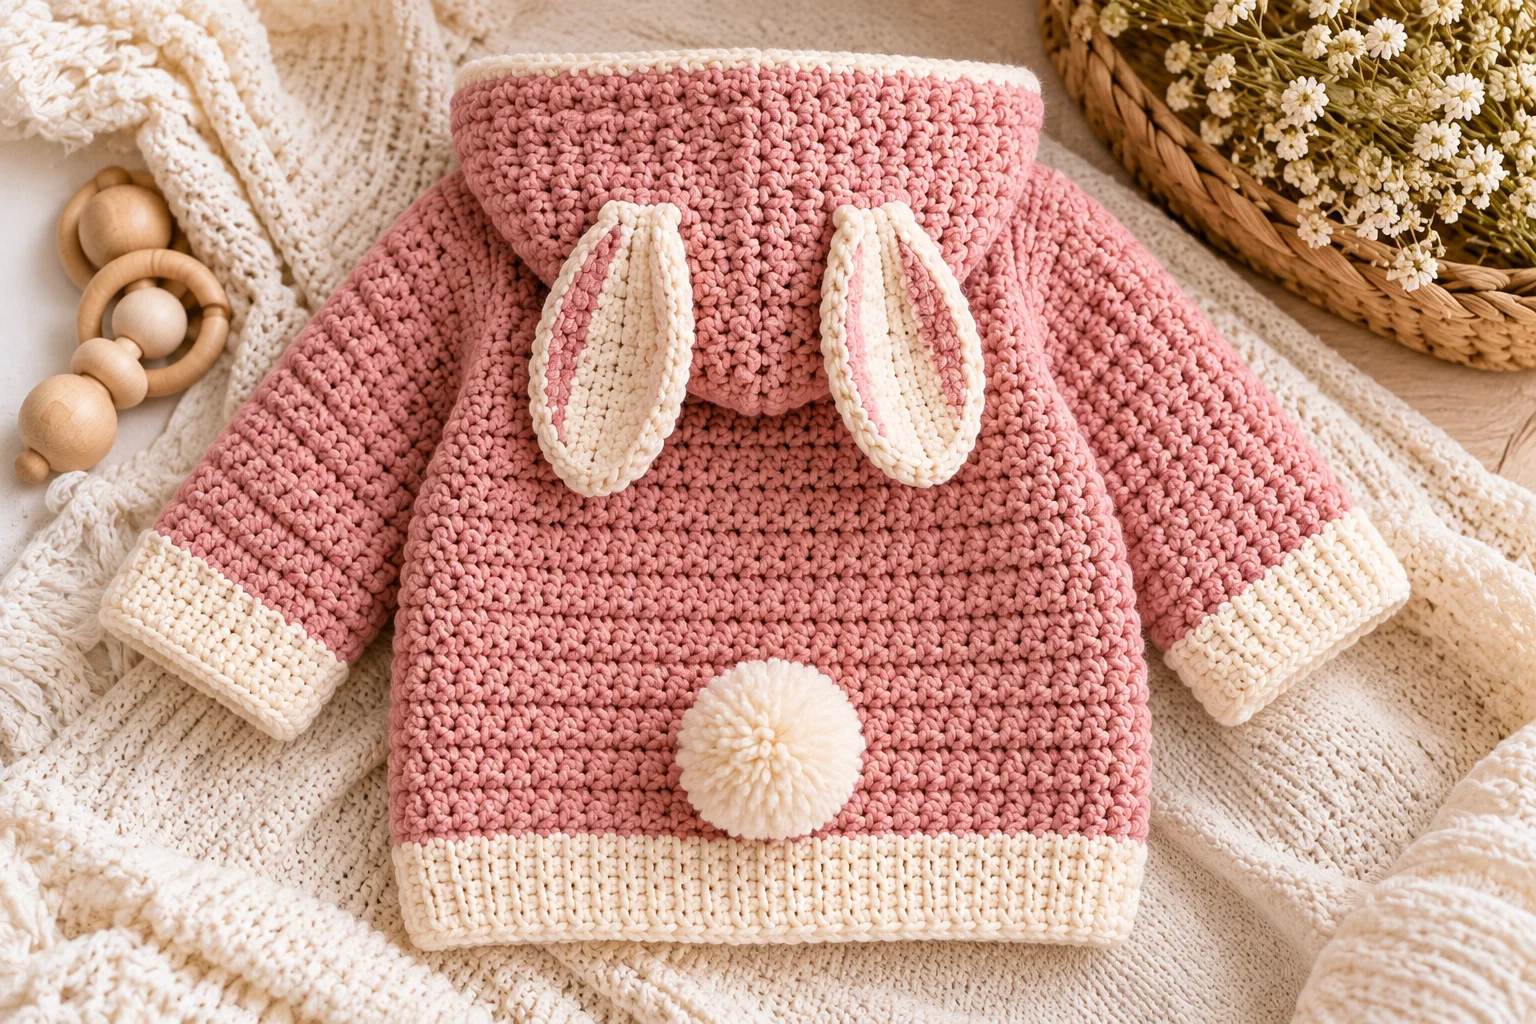
Try a contrasting hood, cuffs, or sleeves.
For example:
- Cream body with mustard details
- Gray body with blue sleeves
- Beige body with brown edging
- Pink body with cream trim
Add Stripes
Simple horizontal stripes can give the hoodie a playful look.
Change colors at consistent intervals and carry or weave in the yarn according to the construction of your pattern.
Add a Pocket
A small front pocket can be crocheted separately and sewn securely onto the garment.
Keep decorative elements firmly attached and avoid small pieces that could become choking hazards.
Make a Matching Hat
A crochet beanie or earflap hat in the same yarn color can turn the hoodie into a coordinated outfit.
Add Simple Texture
Instead of adding decorations, create visual interest with textured crochet stitches.
Ribbed cuffs, alternating stitch rows, or subtle color changes can make a plain hoodie look more detailed without adding loose parts.
Tips for Crocheting Baby and Toddler Garments
Measure before crocheting
Age ranges are only a starting point. Always compare the garment measurements with the child’s actual measurements whenever possible.
Choose soft yarn
Baby and toddler clothing sits directly against the skin. Select a yarn that feels comfortable and is suitable for frequent washing.
Don’t make the neck opening too tight
The hoodie should be easy to put on and remove.
Keep seams comfortable
Bulky seams can be uncomfortable, especially around the shoulders and underarms.
Wash-test your yarn
If possible, wash a small swatch before making the garment. Some yarns change size or texture after washing.
Allow room for movement
Children need to move, play, and stretch comfortably. Avoid making the garment excessively fitted.
Common Mistakes
The hoodie is too small
This usually happens because the gauge is tighter than expected or because the wrong size was selected.
Always check your gauge before starting the garment.
The sleeves are different lengths
Write down the number of rows and shaping changes used for the first sleeve and follow the same instructions for the second.
The hood does not sit correctly
Check that the hood is centered evenly around the neckline and that the top seam is straight.
The garment edges are uneven
Count stitches regularly and make sure your turning chains are consistent.
The neckline is too tight
The neckline should allow the child’s head to pass through comfortably. Recheck your measurements before completing the finishing edge.
Safety Considerations
This hoodie is intended as clothing, but handmade children’s garments still require careful inspection.
Check the finished garment for:
- Loose yarn ends
- Loose buttons
- Detached embellishments
- Long cords
- Loose decorative pieces
- Rough or scratchy materials
For babies and young toddlers, avoid detachable decorations and neck cords that could create choking, strangulation, or entanglement hazards.
Never leave a baby or young child unattended while wearing a garment with potentially hazardous decorative components.
Inspect the hoodie regularly, particularly after washing and repeated use.
Frequently Asked Questions
Is this hoodie suitable for beginners?
A basic crochet hoodie is manageable for a crocheter who is comfortable with rows, increases, decreases, seaming, and basic garment construction. Beginners may find a simple one-piece or rectangle-based construction easier than a heavily shaped garment.
What yarn is best for a baby hoodie?
Choose a soft, washable yarn that feels comfortable against the skin. Machine-washable yarn can be particularly convenient for children’s clothing because baby and toddler garments often need frequent washing.
Can I make this hoodie in different sizes?
Yes. Crochet garments can be adapted by changing the dimensions of the body, sleeves, and hood. However, size adjustments should be based on measurements and gauge rather than simply adding a few stitches.
Can I use a different yarn weight?
You can, but changing yarn weight will affect the gauge, drape, and finished size. Make a gauge swatch and adjust the pattern only if you are comfortable recalculating the garment measurements.
How do I make the hoodie larger?
The safest approach is to determine the desired finished measurements first, then calculate the stitch and row counts using your gauge.
Can I add a pocket?
Yes. A simple crocheted pocket can be attached to the front of the hoodie. Make sure it is securely sewn and does not include small detachable decorations.
How should I wash a crochet toddler hoodie?
Follow the washing instructions for the yarn used. If the yarn is machine washable, use the recommended cycle and drying method. Reshape the hoodie while damp if necessary.
Final Thoughts
A handmade baby and toddler hoodie can be a rewarding crochet project and a useful addition to a little one’s wardrobe. With soft yarn, careful sizing, and comfortable construction, you can create a cozy garment that works well for everyday layering.
Keep the design simple, pay close attention to gauge, and measure the intended wearer whenever possible. Once you are comfortable with the basic construction, experiment with colors, stripes, textured stitches, and coordinating accessories to create a hoodie that is uniquely yours.