Easy Peasy Lemon Beanie Free Crochet Pattern
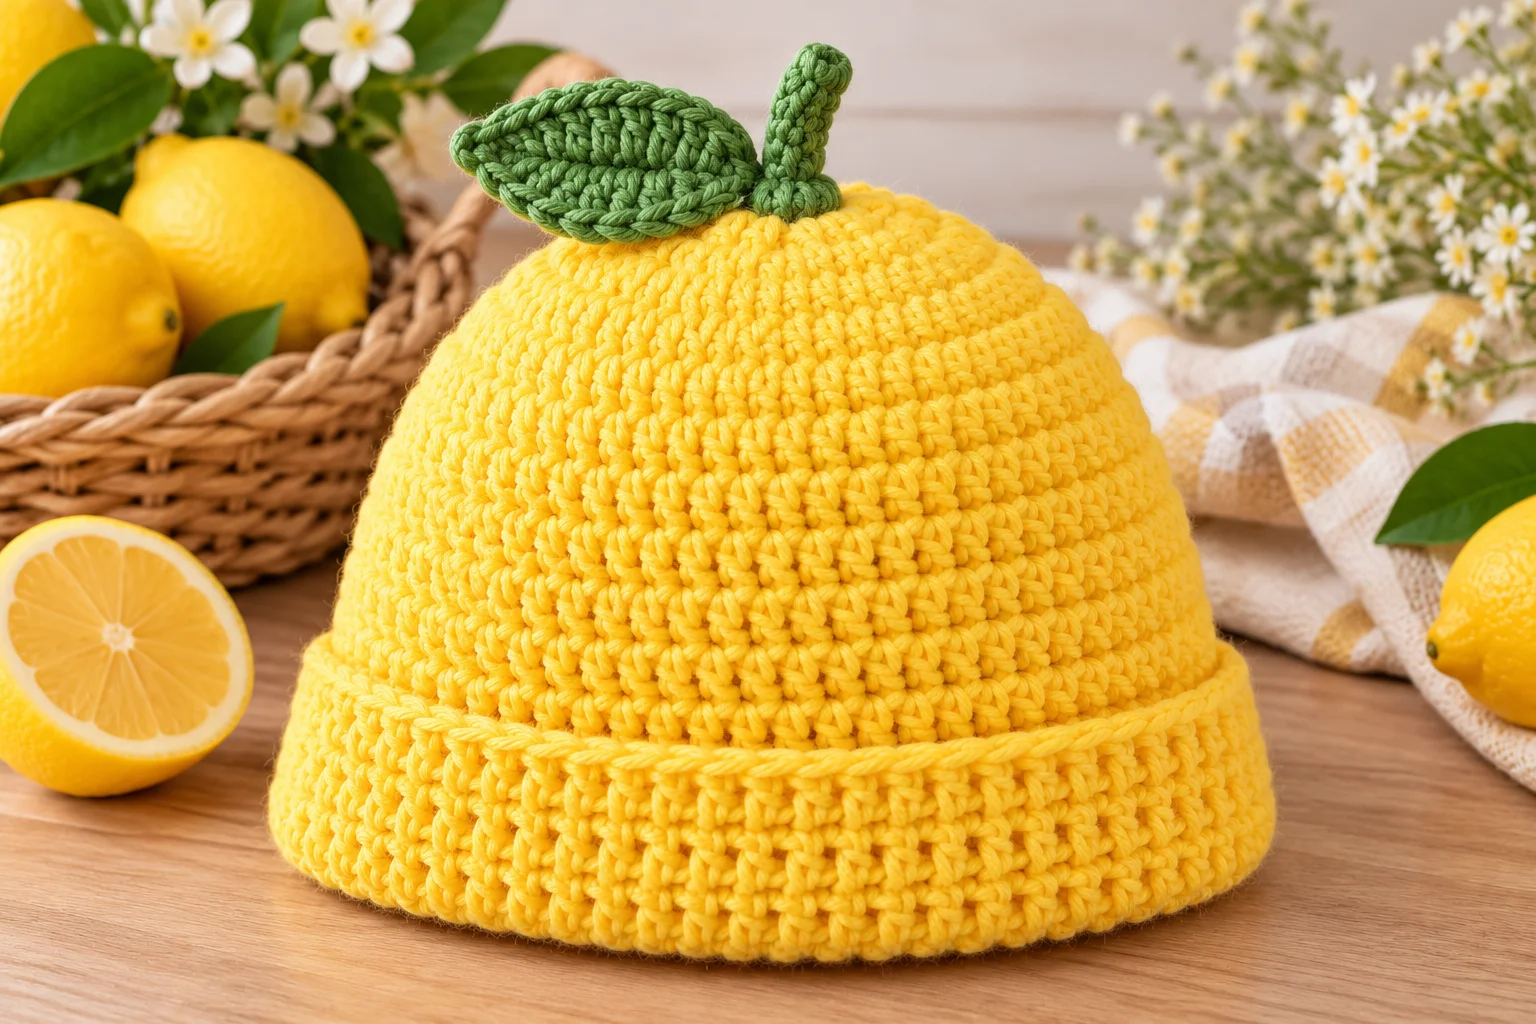
Bright, cheerful, and wonderfully simple, this Easy Peasy Lemon Beanie is a fun crochet hat inspired by the fresh colors of a lemon. The classic yellow beanie is finished with a tiny green leaf and lemon stem for an adorable citrus-inspired look.
This easy crochet beanie is worked from the top down in joined rounds, so there are no complicated pieces to assemble. Once you understand the increase pattern, the main hat works up quickly and is easy to customize.
Whether you’re looking for a fun handmade accessory, a beginner crochet project, or a cute gift, this lemon beanie is a sweet project to add to your crochet list.
Easy Peasy Lemon Beanie Pattern Details
- Pattern type: Crochet beanie
- Skill level: Easy
- Crochet terminology: US terms
- Construction: Top-down
- Yarn weight: Worsted weight
- Hook size: 5 mm (H-8)
- Finished circumference: Approximately 20 inches
- Finished height: Approximately 8 inches
- Fit: Adult
- Main color: Lemon yellow
- Accent color: Green
The finished measurements can vary depending on your tension. For the best fit, compare the hat measurements with the intended wearer’s head circumference.
Materials
Yarn
You will need approximately:
- 180–200 yards worsted-weight yarn in lemon yellow
- Small amount of worsted-weight green yarn
Choose a soft, washable yarn if the hat will be worn frequently.
Crochet Hook
- 5 mm (H-8) crochet hook
Other Supplies
- Tapestry needle
- Scissors
- Stitch marker, optional
Crochet Abbreviations
This pattern uses standard US crochet terminology.
- ch — chain
- sl st — slip stitch
- sc — single crochet
- hdc — half double crochet
- dc — double crochet
- st/sts — stitch/stitches
- inc — increase
- rep — repeat
An increase means crocheting two stitches into the same stitch.
Gauge
Approximately 12 dc x 7 rounds = 4 inches.
Gauge is not critical for making the hat, but it will affect the finished size. If your gauge is looser, the hat will be larger. If your gauge is tighter, the hat will be smaller.
Finished Size
The finished hat measures approximately:
- Circumference: 20 inches
- Height: 8 inches
The hat is designed to have some stretch.
To adjust the circumference, stop increasing once the crown reaches the desired width, then continue working even rounds.
Easy Peasy Lemon Beanie Crochet Pattern
Main Hat
The hat is worked from the crown downward.
Join each round with a slip stitch to the first stitch unless otherwise stated.
Round 1
Using lemon-yellow yarn, make a magic ring.
Ch 2, then work 10 dc into the ring.
Sl st to the first dc to join.
(10 sts)
Round 2
Ch 2.
Work 2 dc in each stitch around.
Sl st to the first dc.
(20 sts)
Round 3
Ch 2.
Dc in the next stitch, 2 dc in the next stitch.
Repeat from * around.
Sl st to the first dc.
(30 sts)
Round 4
Ch 2.
Dc in the next 2 stitches, 2 dc in the next stitch.
Repeat from * around.
Sl st to the first dc.
(40 sts)
Round 5
Ch 2.
Dc in the next 3 stitches, 2 dc in the next stitch.
Repeat from * around.
Sl st to the first dc.
(50 sts)
Round 6
Ch 2.
Dc in the next 4 stitches, 2 dc in the next stitch.
Repeat from * around.
Sl st to the first dc.
(60 sts)
At this point, the crown should measure approximately 6½–7 inches across, depending on your tension.
Hat Body
Round 7
Ch 2.
Dc in each stitch around.
Sl st to the first dc.
(60 sts)
Rounds 8–13
Repeat Round 7.
(60 sts)
The hat should now have enough depth to reach approximately the upper portion of the wearer’s head.
Try the hat on before finishing. If additional length is needed, work another round of dc.
Crochet the Brim
For a slightly more structured lower edge, switch to half double crochet.
Round 14
Ch 1.
Hdc in each stitch around.
Sl st to the first hdc.
(60 sts)
Round 15
Ch 1.
Hdc in each stitch around.
Sl st to the first hdc.
(60 sts)
Fasten off and weave in the end.
Your basic lemon beanie is now complete.
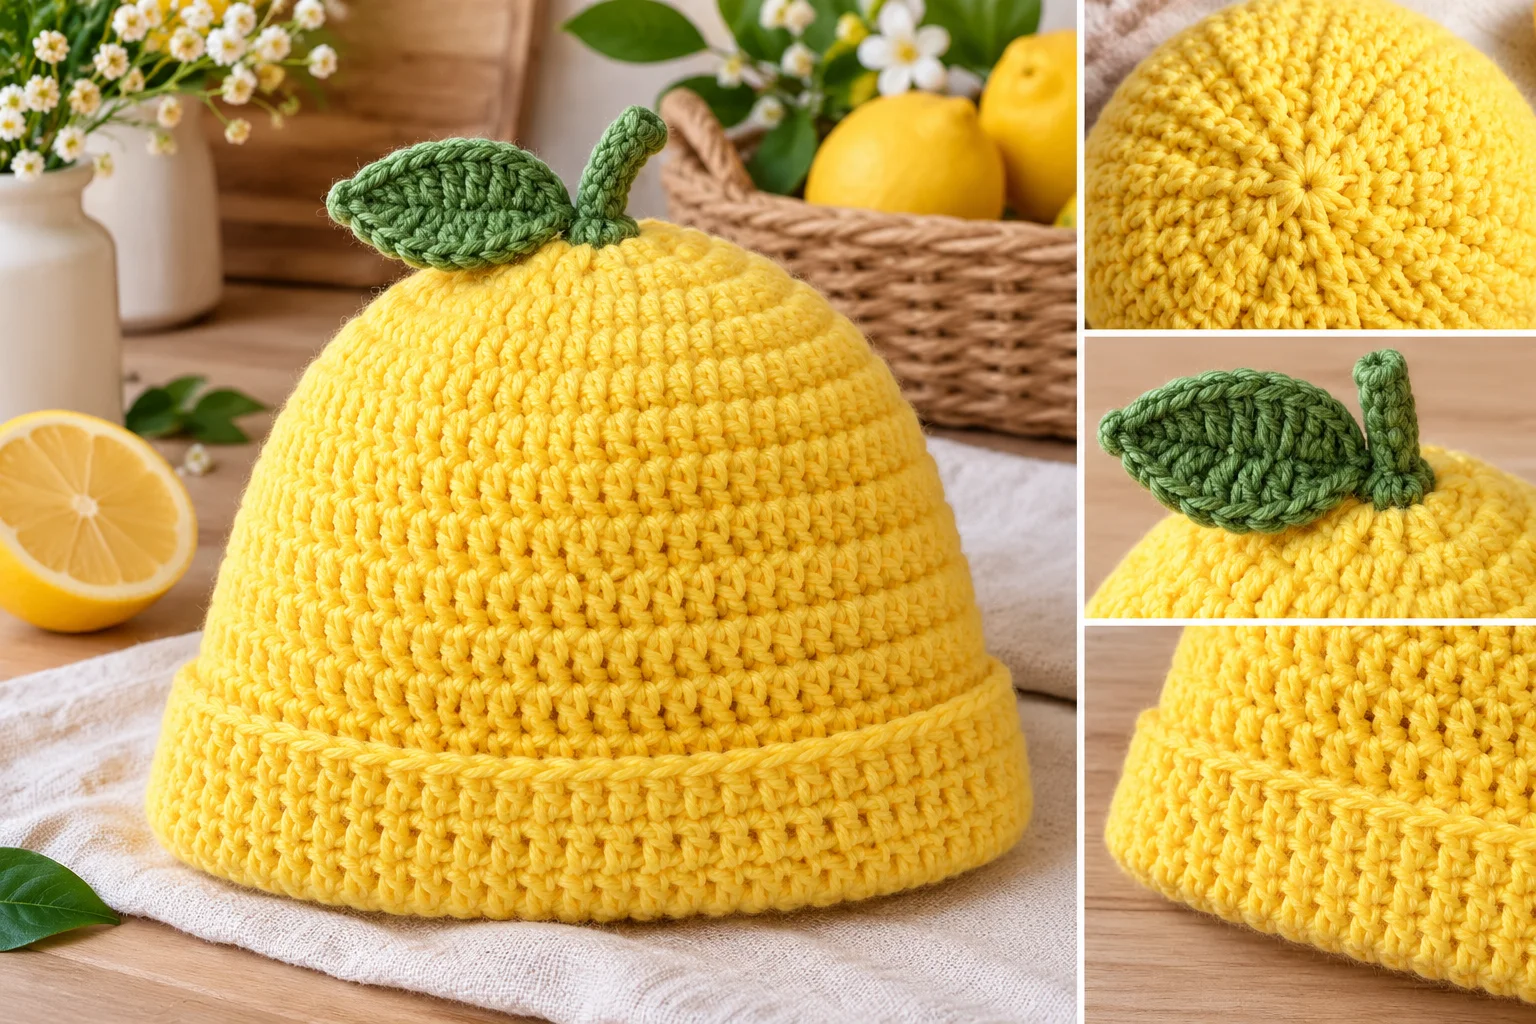
Crochet Lemon Leaf
The small green leaf is what gives this hat its citrus-inspired personality.
Using green yarn, chain 7.
Leaf Row
Starting in the second chain from the hook:
Sc in the next stitch, hdc in the next stitch, dc in the next 2 stitches, hdc in the next stitch, sc in the final stitch.
Do not turn.
Working along the opposite side of the foundation chain, sc in the first stitch, hdc in the next stitch, dc in the next 2 stitches, hdc in the next stitch, sc in the final stitch.
Sl st to the starting point.
Fasten off, leaving a long tail for sewing.
Gently shape the leaf with your fingers.
Crochet Lemon Stem
Using green yarn, chain 5.
Sl st in the second chain from the hook and in each remaining chain.
Fasten off, leaving a yarn tail for attaching the stem.
Roll or position the small chain into a slight curve so it resembles the short stem of a lemon.
Assembling the Lemon Top
Place the green leaf near the center of the hat’s crown.
Position the small stem directly above the leaf.
Using the yarn tails and a tapestry needle, sew the pieces securely to the crown.
Make several small stitches through the base of each piece rather than relying on one stitch.
Once everything is securely attached, weave the remaining yarn ends through the wrong side of the hat and trim the excess.
Optional Lemon Detail
For a slightly fuller citrus look, you can make a second small leaf and place it beside the first.
Keep the embellishments relatively flat so the hat remains comfortable to wear.
How to Customize the Lemon Beanie
One of the easiest things about this pattern is how simple it is to change the look.
Make a Smaller Hat
For a smaller circumference, stop increasing after Round 5.
You will have 50 stitches around the crown.
Continue working even rounds until the hat reaches the desired depth.
Make a Larger Hat
For a larger hat, continue the established increase pattern before beginning the straight sides.
The next increase round would follow this sequence:
Dc in the next 5 stitches, 2 dc in the next stitch.
Repeat around.
This produces 70 stitches.
Continue increasing in the same manner until the crown reaches the circumference you need.
Change the Lemon Color
Yellow is the obvious choice, but you can create different citrus-inspired hats with other colors.
Try:
- Bright yellow with dark green
- Pale yellow with sage green
- Golden yellow with forest green
- Cream with soft green
- Lime green with darker green
You can even make several hats in different citrus colors for a matching family set.
Tips for Crocheting the Beanie
Keep Your Increase Rounds Even
The first six rounds determine the shape of the crown. Count your stitches after every increase round to make sure you have the correct number.
The stitch counts should be:
- Round 1: 10
- Round 2: 20
- Round 3: 30
- Round 4: 40
- Round 5: 50
- Round 6: 60
If the count is incorrect, the crown may become wavy or cup inward.
Don’t Crochet the Brim Too Tightly
A tight brim can make a beanie uncomfortable and reduce its stretch.
Keep your tension relaxed when working the final rounds.
Check the Fit Before Finishing
Because crochet tension varies from person to person, try the hat on before weaving in the final ends.
If it needs more length, simply add another round or two of dc before working the brim.
Secure the Leaf Well
The leaf is decorative, so make sure it is firmly attached.
Use several stitches around its base and securely weave in the yarn tails.
Common Mistakes
The Crown Is Wavy
If your crown is wavy, you may be working too many increases or your tension may be too loose.
Check your stitch count and make sure each increase round follows the specified pattern.
The Crown Is Cupping
If the crown is forming a bowl shape rather than lying relatively flat, you may need more increases.
Check that every increase is being worked correctly.
The Hat Is Too Small
If the hat is too small even though your stitch count is correct, your tension may be tighter than the pattern gauge.
Try using a larger hook or add another increase round.
The Hat Is Too Large
If the hat is too loose, your tension may be looser than the stated gauge.
A smaller hook can help reduce the finished size.
Frequently Asked Questions
Is this lemon beanie beginner-friendly?
Yes. The main hat uses basic double crochet stitches and straightforward increases. The leaf and stem are small separate pieces that can be sewn onto the finished hat.
How long does it take to crochet a lemon beanie?
The time varies depending on crochet speed and experience. An experienced crocheter can generally complete a simple beanie in a relatively short sitting, while beginners may need more time to check their stitch counts and tension.
Can I use a different yarn weight?
Yes, but changing yarn weight will change the finished size and appearance.
If you use thinner or thicker yarn, make a gauge swatch and measure the crown before continuing with the straight sides.
Can I sell finished lemon beanies?
Yes, you can generally sell finished items you make from an original crochet pattern. Do not sell or redistribute the written pattern itself as your own.
Can I make this beanie for a child?
Yes. The pattern can be adapted by adjusting the number of crown increases and the number of body rounds.
Always measure the intended wearer’s head rather than relying solely on age-based sizing.
Can I make the lemon leaf without the stem?
Absolutely. The beanie still looks cute with a simple green leaf attached to the crown.
For an even more minimalist design, you can leave off both embellishments and use yellow yarn for a classic yellow beanie.
Final Thoughts
The Easy Peasy Lemon Beanie combines a classic crochet hat shape with a playful citrus-inspired finish. The main beanie is simple enough for a beginner to practice basic increases, while the little green leaf and stem add a fun handmade detail.
Once you’ve made the basic version, experiment with different shades of yellow and green, add a second leaf, or adapt the crown measurements to create your own collection of fruit-inspired crochet hats.
It’s a simple project with plenty of room for creativity—and a cheerful way to add a little sunshine to your crochet wardrobe.