How to Crochet an Adorable Bear Beanie
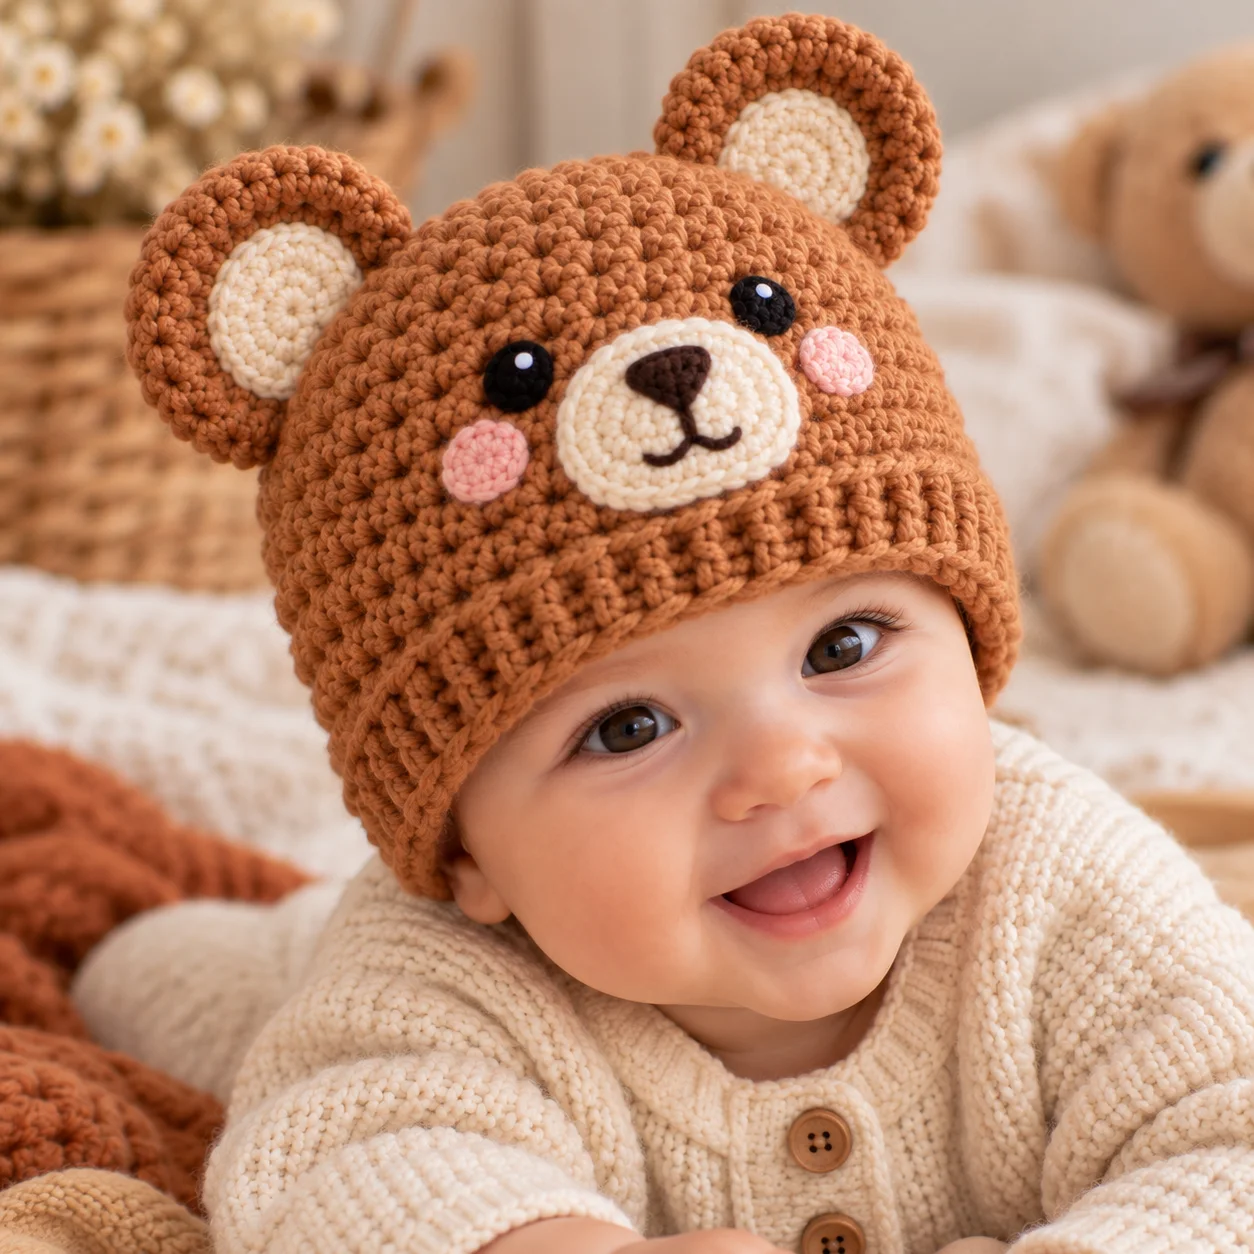
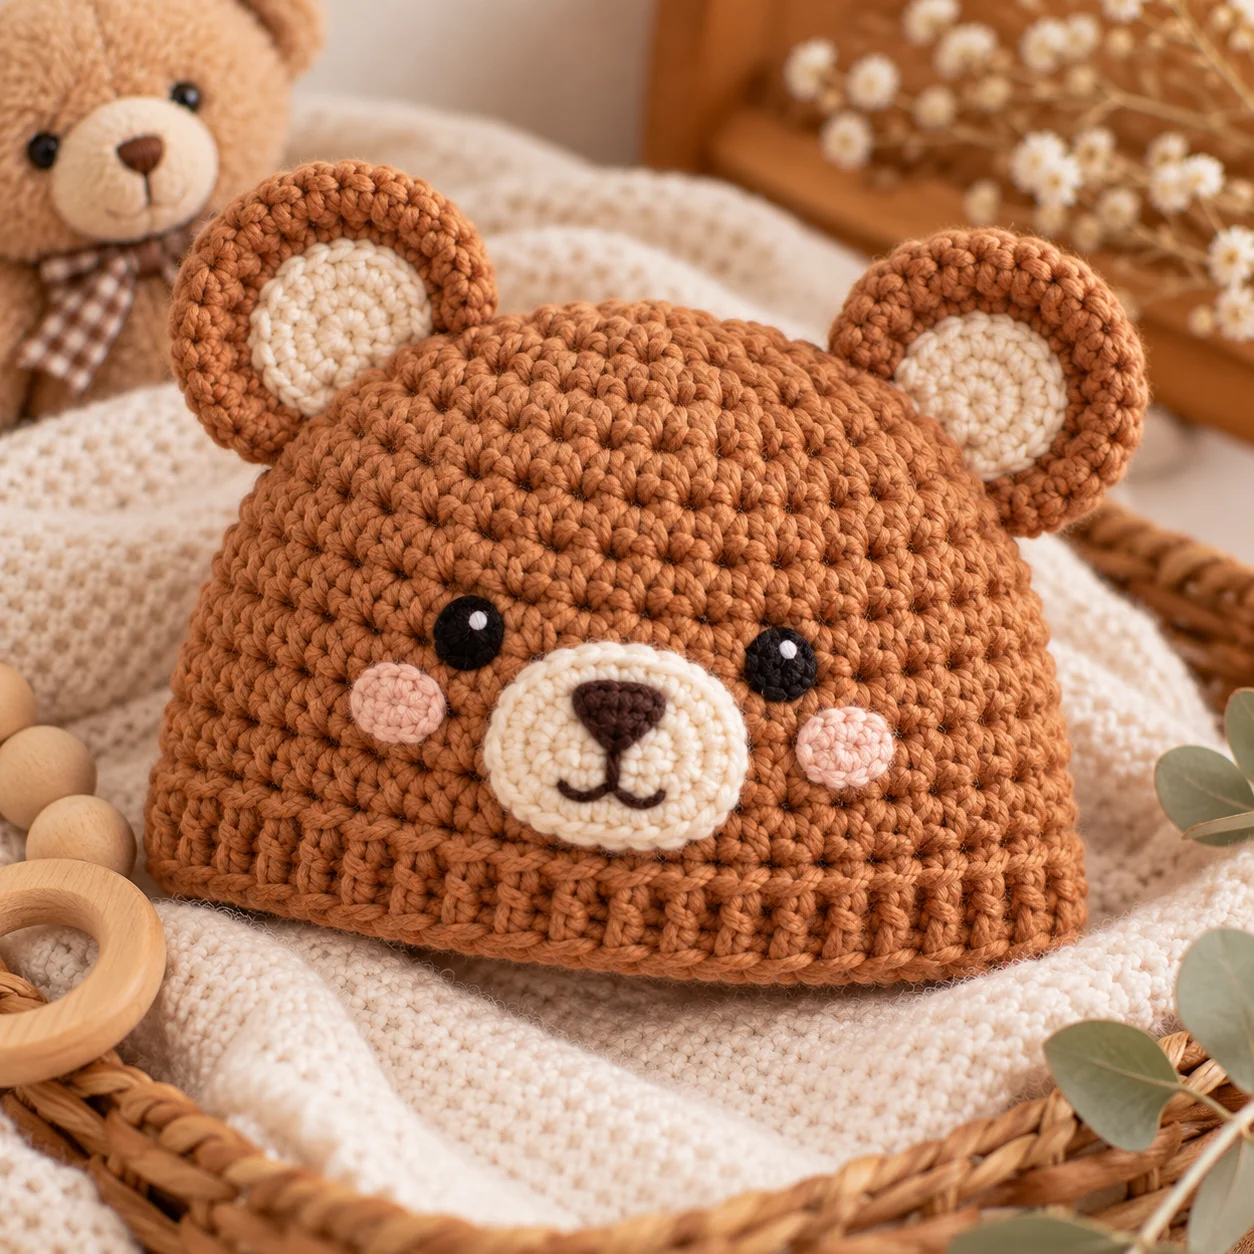
Looking for a cute crochet hat that is warm, playful, and easy to personalize? This Adorable Bear Beanie is a cozy handmade hat featuring a classic beanie shape and two rounded bear ears.
The pattern uses simple crochet stitches, making it a great project for confident beginners. Choose brown yarn for a traditional teddy bear look, or experiment with cream, beige, gray, pink, or even a soft pastel shade.
Project Overview
This bear beanie is crocheted from the crown downward. The hat is shaped with evenly spaced increases, followed by straight rounds to create the sides. Two small crocheted ears are made separately and sewn securely to the top.
Skill level: Easy
Construction: Top-down beanie
Terminology: US crochet terms
Sizes: Baby, Toddler, Child, Adult
Materials
- Worsted-weight (#4) yarn
- 4.0 mm crochet hook
- Yarn needle
- Scissors
- Stitch marker
- Measuring tape
For the sample color combination:
- Main color: warm brown
- Ear color: same brown
- Optional inner-ear color: cream or light beige
Use a soft, washable yarn for children’s hats.
Crochet Abbreviations
- ch – chain
- sl st – slip stitch
- sc – single crochet
- hdc – half double crochet
- dc – double crochet
- inc – increase
- st/sts – stitch/stitches
- BLO – back loop only
Finished Measurements
Approximate finished hat circumference:
| Size | Head Circumference |
|---|---|
| Baby | 15–16 in |
| Toddler | 17–18 in |
| Child | 18–20 in |
| Adult | 21–23 in |
Measure the intended wearer’s head when possible. The finished hat should have a little negative ease so that it stays comfortably in place.
The instructions below give the Toddler/Child size. A simple sizing guide is included afterward.
Bear Beanie Crochet Pattern
Crown
Using brown yarn, make a magic ring.
Round 1
Ch 2. Work 10 dc into the magic ring.
Sl st to the first dc. (10 sts)
Round 2
Ch 2.
Work 2 dc in each stitch around.
Sl st to the first dc. (20 sts)
Round 3
Ch 2.
Dc in next st, 2 dc in next st.
Repeat from * around.
Sl st to the first dc. (30 sts)
Round 4
Ch 2.
Dc in next 2 sts, 2 dc in next st.
Repeat from * around.
Sl st to the first dc. (40 sts)
Round 5
Ch 2.
Dc in next 3 sts, 2 dc in next st.
Repeat from * around.
Sl st to the first dc. (50 sts)
At this point, measure the diameter of the crown. For a toddler/child hat, continue increasing if the crown is not yet wide enough for the intended head circumference.
Hat Body
Once the crown reaches the desired diameter, stop increasing.
Round 6
Ch 2.
Dc in each stitch around.
Sl st to the first dc. (50 sts)
Rounds 7–11
Repeat Round 6.
The hat should now have a simple rounded beanie shape.
If you need a deeper hat, continue working additional rounds of dc until the hat reaches the desired length.
Bottom Edge
For a neat, slightly stretchy finish, switch to single crochet.
Round 12
Ch 1.
Sc in each stitch around.
Sl st to the first sc. (50 sts)
Round 13
Ch 1.
Working in the BLO, sc in each stitch around.
Sl st to the first sc. (50 sts)
Fasten off and weave in the ends.
Bear Ears
Make 2.
The ears are worked in rounds.
Using brown yarn, make a magic ring.
Round 1
Ch 1.
Work 6 sc into the ring.
Sl st to the first sc. (6 sts)
Round 2
Ch 1.
Work 2 sc in each stitch around.
Sl st to the first sc. (12 sts)
Round 3
Ch 1.
Sc in next st, 2 sc in next st.
Repeat from * around.
Sl st to the first sc. (18 sts)
Fasten off, leaving a long yarn tail for sewing.
The piece should resemble a small rounded circle.
Fold the ear gently in half so the bottom edge forms a slight curve.
Optional Inner Ear
For a contrasting inner ear, make two smaller circles using cream or beige yarn.
Round 1
Make a magic ring and work 6 sc into the ring.
Sl st to the first sc. (6 sts)
Round 2
Ch 1.
Work 2 sc in each stitch around.
Sl st to the first sc. (12 sts)
Fasten off, leaving a sewing tail.
Sew one inner-ear piece onto each brown ear.
For a simpler bear, you can skip the inner-ear pieces entirely.
Attaching the Ears
Place the ears near the top of the beanie.
For a balanced look, position them approximately the same distance from the center of the hat.
Pin or hold each ear in place and sew it securely to the hat using the long yarn tail.
Work through several stitches of both the ear and hat.
Tie off securely on the inside and weave in the remaining yarn.
Avoid leaving loose yarn tails inside the hat.
Optional Bear Face
The hat looks adorable with just the ears, but you can add a simple embroidered face.
Using black or dark brown yarn:
- Embroider two small eyes.
- Add a small oval or triangular nose.
- Add a short curved line beneath the nose for a mouth.
Keep the facial features securely embroidered rather than using buttons or other detachable pieces, especially for babies and young children.
Sizing the Bear Beanie
The easiest way to customize the hat is by adjusting the crown before beginning the straight body rounds.
Baby
Work fewer increase rounds and stop when the crown diameter is appropriate for the baby’s head.
Toddler
The five crown increase rounds provided above generally create a suitable starting point for the toddler/child size when worked at the stated gauge.
Child
Continue the crown increases if additional width is needed, then work straight rounds until the desired length is reached.
Adult
Use a larger hook and/or heavier yarn if necessary, or continue increasing the crown until the diameter matches the intended head size.
Always measure rather than relying solely on age ranges.
Gauge
Approximately 12 dc x 7 rounds = 4 inches.
Gauge can vary considerably depending on yarn, hook size, and tension. For the best fit, measure your crown and compare it with the intended head measurement.
Tips for a Better Fit
Measure the head
Head measurements are more reliable than age-based sizing.
Don’t over-increase
Once the crown reaches the required diameter, stop increasing. Continuing increases will make the hat flare outward.
Check the depth
Try the hat on as you crochet, when possible. Add or remove straight rounds to adjust the length.
Keep the ears symmetrical
Place both ears before sewing so you can check their position from the front.
Secure embellishments
For children’s hats, embroidered facial details are a safer option than buttons, beads, or other small detachable pieces.
Color Ideas
Try these combinations for different bear personalities:
- Classic Teddy: warm brown + cream
- Polar Bear: ivory + white
- Honey Bear: golden tan + cream
- Chocolate Bear: dark brown + beige
- Blush Bear: dusty pink + cream
- Woodland Bear: taupe + oatmeal
You can also make the hat in a neutral color and use a contrasting shade only for the ears.
Safety
For babies and young children, avoid buttons, beads, plastic eyes, bells, or other small detachable decorations that could become choking hazards.
Make sure all embroidered details and sewn-on ears are firmly attached. Inspect the hat regularly for loose stitching or damaged components.
Never leave a baby or young child unattended with a damaged handmade item.
Frequently Asked Questions
Is this bear beanie beginner-friendly?
Yes. The hat uses basic crochet stitches and simple increases. The ears are also straightforward and are attached separately.
Can I make the bear beanie without a magic ring?
Yes. You can begin with a short chain joined into a ring instead. The crown may have a slightly different center appearance.
Can I use chunky yarn?
Yes, but the finished hat will be larger. Use the wearer’s head measurement and adjust the hook size and number of rounds as necessary.
How do I make the bear ears stand out more?
Use a contrasting inner-ear color or slightly stiffen the ears by sewing them firmly at the bottom. Avoid materials that could create a safety hazard for babies.
Can I make this hat for a baby?
Yes. Choose a soft baby-friendly yarn and keep the design simple. For babies, embroidered facial features are preferable to loose embellishments.
Final Thoughts
This Adorable Bear Beanie is a fun crochet project that turns a basic winter hat into a cute woodland-inspired accessory. The simple construction makes it easy to customize, while the little rounded ears give it that unmistakable teddy bear character.
Make one in classic brown for a traditional bear look, or experiment with different colors to create a whole collection of cozy crochet animal hats.