Crochet Field of Daisies Square
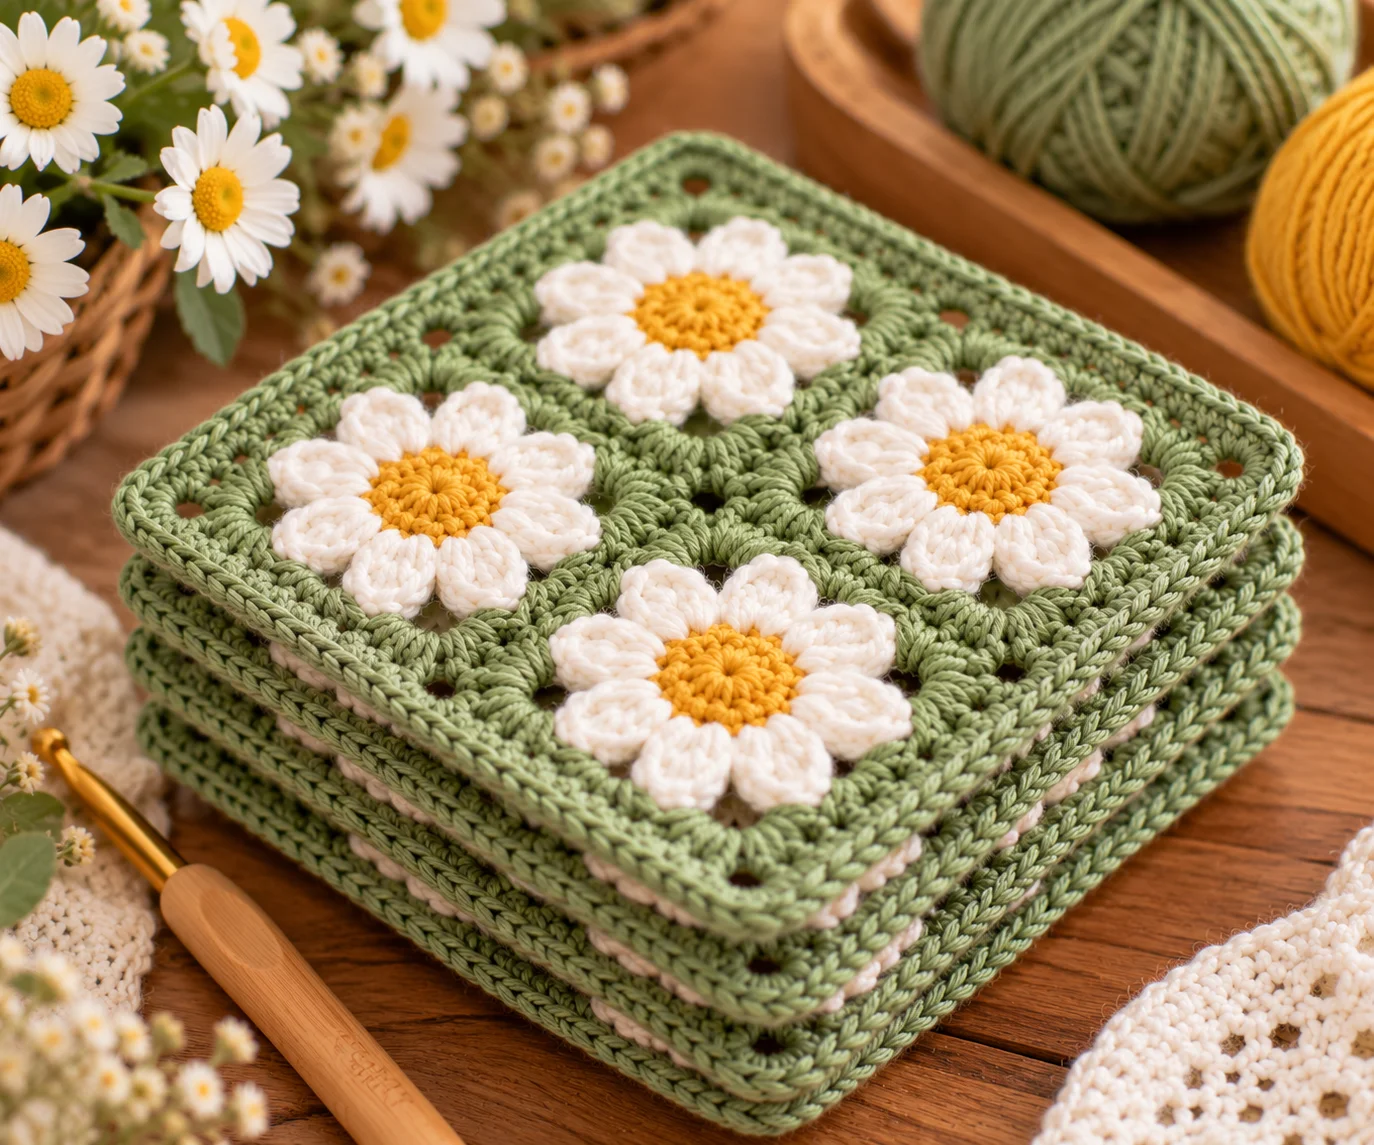
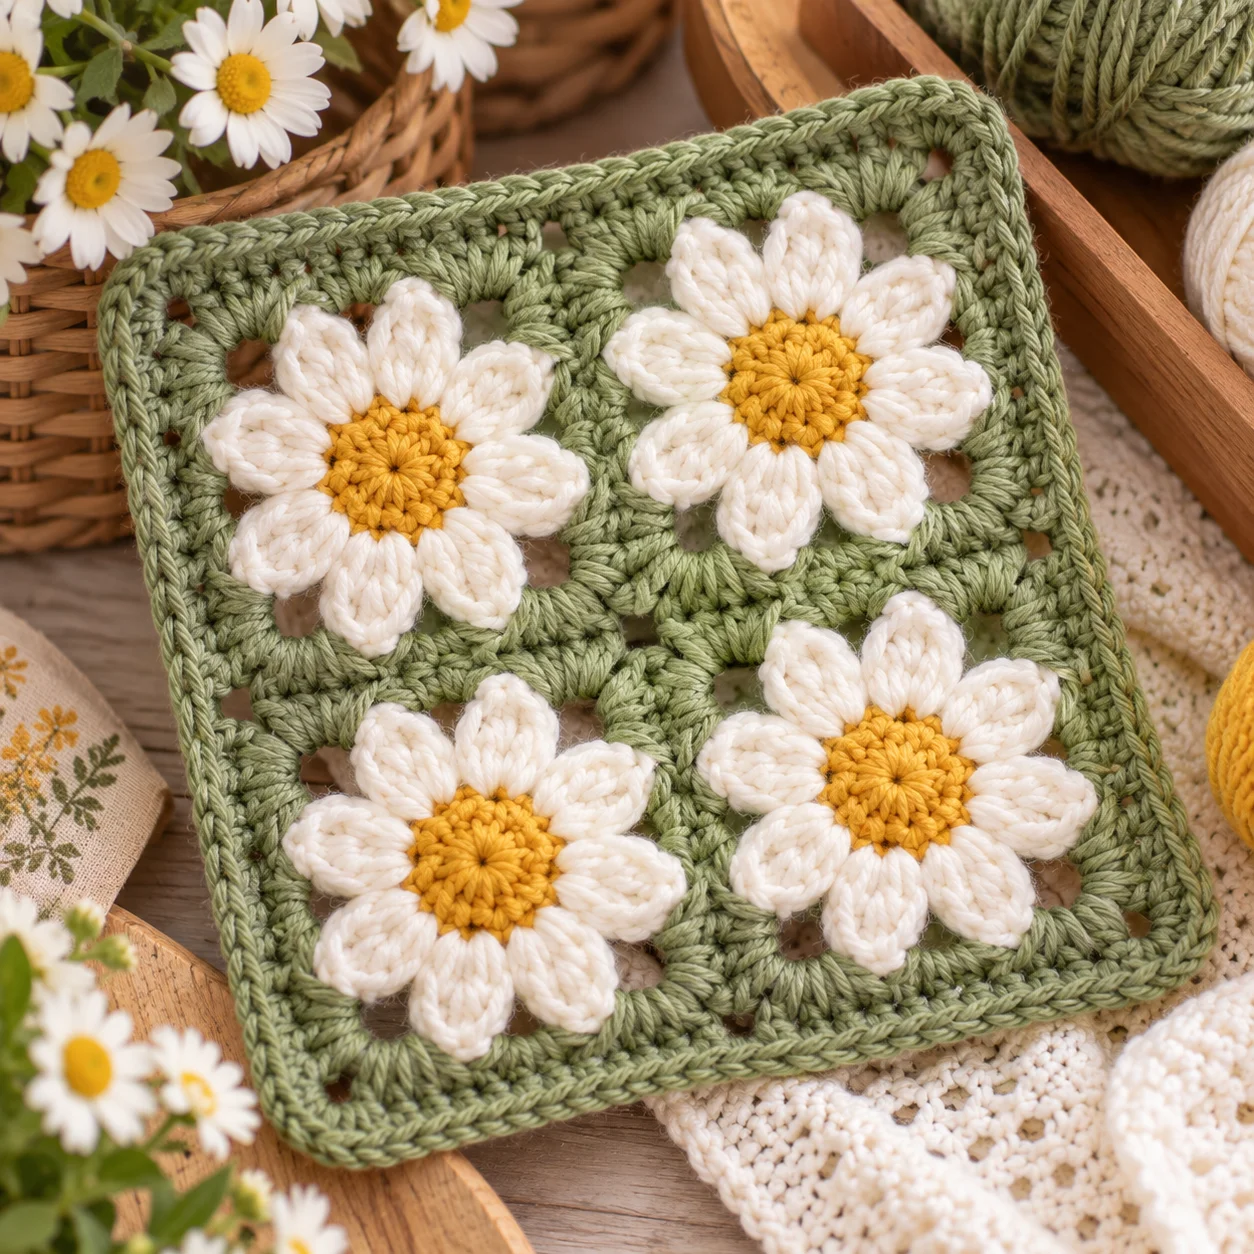
Bring a little sunshine to your crochet projects with this Crochet Field of Daisies Square. This colorful floral square features small white daisies scattered across a soft green background, creating the look of a miniature meadow.
The square is worked in rounds, making it easy to repeat for a larger blanket or mix with other crochet motifs. Change the background color or flower shades to create your own seasonal palette.
Project Overview
- Skill level: Intermediate
- Finished size: Approximately 6 inches square
- Construction: Worked from the center outward
- Terminology: US crochet terms
- Best for: Blankets, pillows, bags, scarves, wall hangings, and home décor
The finished size will vary depending on yarn, hook size, and tension.
Materials
- Worsted-weight (#4) yarn in:
- Green for the meadow background
- White for the daisy petals
- Yellow for flower centers
- Optional light green for accents
- 4.0 mm crochet hook
- Yarn needle
- Scissors
For a softer vintage look, try cream petals instead of bright white.
Crochet Abbreviations
- ch – chain
- sl st – slip stitch
- sc – single crochet
- hdc – half double crochet
- dc – double crochet
- tr – treble crochet
- st/sts – stitch/stitches
- sk – skip
- sp – space
- BLO – back loop only
Special Stitch
Daisy Petal
A petal is created by working several stitches into the same stitch or space.
For this pattern, each daisy uses a yellow center surrounded by white petals.
Crochet Field of Daisies Square Pattern
The square is built in layers. Work the daisy centers first, add the petals, and then use green yarn to build the background around the flowers.
Daisy 1
With yellow yarn, make a magic ring.
Round 1
Ch 1.
Work 8 sc into the ring.
Sl st to the first sc.
Fasten off. (8 sts)
Join white yarn to any stitch.
Round 2
Ch 1.
Sl st in next st, ch 3, work 3 dc into the same stitch, ch 3, sl st in the same stitch.
Repeat around to create 8 petals.
Sl st to the beginning.
Fasten off.
You now have one small daisy.
Daisy 2
Make a second daisy using the same instructions.
Daisy 3
Make a third daisy.
Daisy 4
Make a fourth daisy.
For the classic four-flower arrangement, place one flower toward each corner of the future square.
Joining the Daisies
Arrange the four flowers so there is a small gap between them.
Using green yarn, begin connecting the flowers by working into the stitches around each flower.
The green background will gradually fill the spaces between the flowers.
Rather than joining the flowers with a separate seam, crochet directly around them for a seamless appearance.
Green Background
Join green yarn between two daisies.
Round 1
Ch 1.
Work sc stitches around the outer edges of the four flowers, using the spaces between petals to help form the background.
At each area where two flowers meet, work into the available spaces rather than pulling the fabric tightly.
Continue around and sl st to the beginning.
The exact stitch placement may vary slightly depending on your tension and how closely you arranged the flowers.
Forming the Square
The next rounds turn the floral center into a square.
Round 2
Ch 3.
Work dc across the first side.
At each corner, work:
2 dc, ch 2, 2 dc
Continue around all four sides.
Sl st to the beginning.
Your motif should now begin to look square rather than round.
Round 3
Ch 3.
Dc in each stitch across the side.
At each corner, work:
2 dc, ch 2, 2 dc
Repeat around.
Sl st to the beginning.
Round 4
Ch 1.
Sc in each stitch around.
At each corner, work:
sc, ch 2, sc
Sl st to the first sc.
Fasten off.
Weave in all ends securely.
Creating a Larger Square
If you would like a larger motif, continue adding rounds around the outside.
For each additional round:
- Work dc across each side.
- Work 2 dc, ch 2, 2 dc in every corner.
- Keep the side stitches even.
- Finish with a slip stitch.
Continue until the square reaches your desired size.
Blocking the Square
Blocking is especially helpful for floral squares because the petals can cause the fabric to ripple slightly.
Lightly dampen the square and gently stretch it into shape.
Pin the four corners evenly and allow the square to dry completely.
Avoid stretching aggressively, as this can distort the flower shapes.
Color Ideas
The beauty of a field-of-daisies square is that you can completely change the mood with your color choices.
Classic Meadow
- White petals
- Golden yellow centers
- Soft green background
Vintage Garden
- Cream petals
- Mustard centers
- Sage green background
Spring Pastels
- White and pale pink flowers
- Butter yellow centers
- Mint green background
Sunny Summer
- Bright white petals
- Golden centers
- Leaf green background
Autumn Garden
Try cream petals with mustard, rust, and golden flower centers against an olive or moss-green background.
Turning the Squares Into a Blanket
Make multiple Field of Daisies Squares and join them together to create a floral blanket.
You can keep every square identical for a coordinated look, or change the flower-center colors throughout the project.
For example, alternate:
- Yellow centers
- Pink centers
- Orange centers
- Lavender centers
Keep the background color consistent to make the different flowers look like one cohesive meadow.
Joining Options
Whip Stitch
Place two squares together with their wrong sides facing and sew the edges together.
Slip Stitch Join
Crochet the squares together with slip stitches for a slightly raised seam.
Flat Crochet Join
Join the squares from the front for a decorative raised line between motifs.
Tips for a Neat Square
Count your corners
The four corners should remain clearly defined throughout the square. If the fabric begins to curl, you may need additional increases.
Don’t pull the petals tightly
Loose, relaxed stitches help the flowers retain their shape.
Keep your tension consistent
Uneven tension can make one flower larger than another.
Block before joining
If you’re making a blanket, blocking the individual squares before assembly can make the finished project look much more polished.
Common Mistakes
The square is curling
This usually means there are not enough increases in the corners or your stitches are too tight.
The square looks wavy
Too many increases can create excess fabric. Check that you are following the corner formula consistently.
The flowers disappear into the background
Use stronger color contrast between the petals, centers, and green background.
The square isn’t perfectly square
Don’t worry about small differences immediately. Blocking can help straighten minor unevenness.
Project Ideas
Use your finished Field of Daisies Squares for:
- Crochet blankets
- Throw pillows
- Tote bags
- Table runners
- Placemats
- Wall hangings
- Baby blankets
- Cushion covers
- Garlands
- Decorative panels
Several smaller squares can also be joined into a colorful floral bag or pouch.
Frequently Asked Questions
Can I use cotton yarn?
Yes. Cotton is an excellent choice for squares used in bags, pillows, placemats, and other home décor projects.
Can I make the flowers different colors?
Absolutely. A field of flowers looks especially pretty when each daisy has a different colored center or when some flowers use pastel petals.
Can I make this square larger?
Yes. Continue adding rounds around the outside while maintaining the same corner increase structure.
Do I have to block the square?
Blocking isn’t mandatory, but it can make a significant difference in the final shape, especially when several squares will be joined together.
Can I use these squares for a baby blanket?
Yes. Choose soft, washable yarn and avoid adding loose buttons, beads, or other detachable decorations.
Final Thoughts
The Crochet Field of Daisies Square is a cheerful way to bring a garden-inspired feeling to your crochet projects. Once you have made one square, it is easy to experiment with different flower colors and background shades.
Make a single square for a small decorative project or crochet a whole meadow of flowers for a beautiful blanket full of springtime color.