Crochet Toddler Slipper Boots | Easy Classic Boots Pattern
Crochet Toddler Slipper Boots – Easy Toddler Classic Boots Pattern
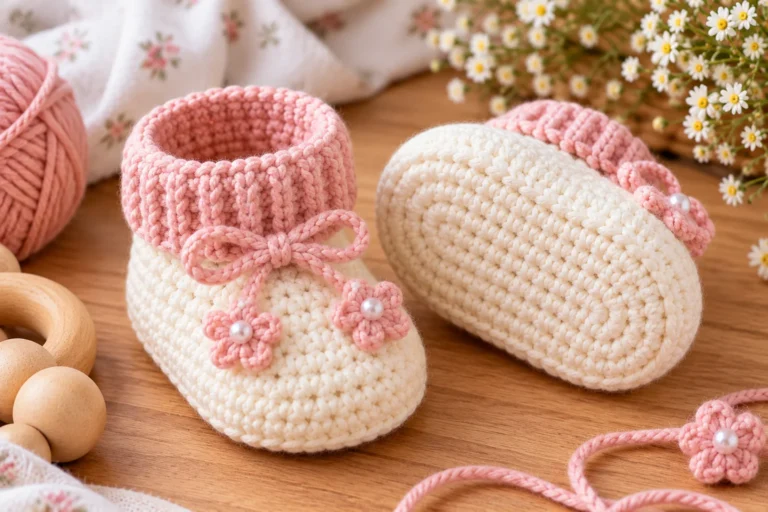
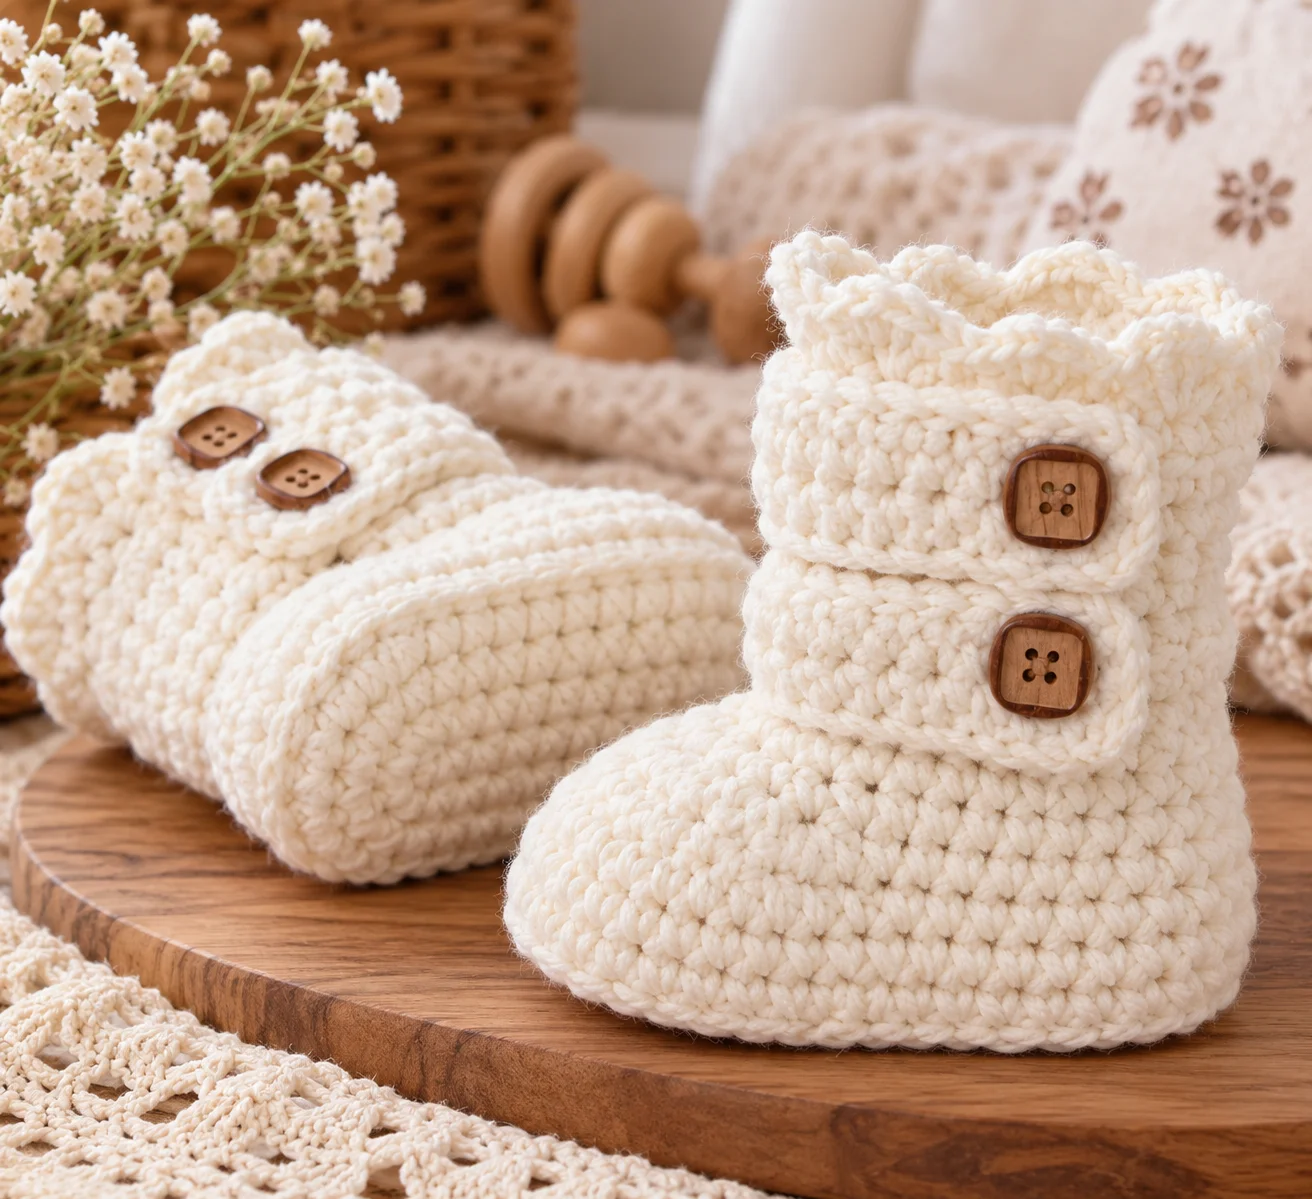
Keep little feet warm and cozy with these crochet toddler slipper boots! These soft house boots are designed with a snug ankle, comfortable sole, and classic boot shape that helps them stay on active little feet.
This is a fun crochet project for fall and winter and makes a thoughtful handmade gift for toddlers. The simple construction also gives you plenty of room to customize the colors, add buttons, or decorate the boots with a small crochet flower or other detail.
Whether you are making them for your own toddler or putting together a handmade gift, these crochet toddler classic boots are practical, cute, and cozy.
Crochet Toddler Slipper Boots at a Glance
- Skill level: Easy to intermediate
- Sizes: Toddler
- Yarn: Worsted-weight (#4)
- Hook: 5 mm (H-8)
- Main stitches: Single crochet, half double crochet
- Construction: Sole worked in rounds, upper worked around the sole
- Style: Classic slipper boot
- Terminology: US crochet terms
Materials
You will need:
- Worsted-weight (#4) yarn
- 5 mm crochet hook
- Yarn needle
- Scissors
- Stitch marker
- Small amount of contrasting yarn, optional
- Buttons, optional for decoration
Choose a soft yarn that feels comfortable against the child’s feet. Acrylic yarn is a practical choice for slippers because it is widely available and easy to care for.
Crochet Abbreviations
- ch – chain
- sc – single crochet
- hdc – half double crochet
- sl st – slip stitch
- st – stitch
- sts – stitches
- sc2tog – single crochet 2 together
- hdc2tog – half double crochet 2 together
- BLO – back loop only
Toddler Size
This pattern is designed for a toddler slipper with an approximately 5-inch foot length.
Because children’s feet vary considerably, measure the child’s foot before starting whenever possible.
For a comfortable fit, compare the finished sole with the child’s actual foot rather than relying entirely on age or shoe size.
Gauge
Approximately:
14 hdc × 10 rows = 4 inches
Gauge can vary depending on yarn and tension. If your sole is becoming too large or too small, adjust your hook size before continuing.
Crochet Toddler Slipper Boots Pattern
The boots are made in two main sections:
- The sole
- The boot upper
The sole is worked in rounds around a foundation chain. The upper is then built upward from the sole to create the slipper-boot shape.
Make two identical boots.
Sole
With your main color, chain 13.
Round 1
Sc in the second chain from the hook.
Sc in the next 10 chains.
Work 3 sc in the final chain.
Continue along the opposite side of the foundation chain.
Sc in the next 10 stitches.
Work 2 sc in the final stitch.
Join with a slip stitch to the first sc.
(26 sts)
Round 2
Ch 1.
Sc in the first stitch.
Work 2 sc in the next stitch.
Sc in the next 10 stitches.
Work 2 sc in each of the next 3 stitches.
Sc in the next 10 stitches.
Work 2 sc in each of the final 2 stitches.
Join with a slip stitch.
(32 sts)
Round 3
Ch 1.
Sc in the first stitch.
2 sc in the next stitch.
Sc in the next 11 stitches.
2 sc in the next stitch, sc in the next stitch.
Repeat around the toe section as established by the previous round.
Continue along the opposite side of the sole and finish the round.
Join with a slip stitch.
Check the shape of the sole before continuing.
It should be oval with a rounded toe and narrower heel.
Building the Boot Upper
The next rounds create the sides of the slipper.
Round 4
Ch 1.
Working in the back loop only, sc evenly around the entire sole.
Join with a slip stitch.
Working into the back loop helps create a visible ridge between the sole and the upper.
Round 5
Ch 1.
Sc in each stitch around.
Join with a slip stitch.
Round 6
Ch 1.
Hdc in each stitch around.
Join with a slip stitch.
Continue checking the shape as the boot begins to rise.
Shaping the Toe
The toe should gradually become rounded rather than remaining completely flat.
Place stitch markers at the approximate center of the toe.
Next Round
Work hdc around until you reach the marked toe section.
Work hdc2tog across the first pair of marked stitches.
Continue working hdc across the toe.
Work another hdc2tog near the opposite side of the toe.
Continue around the remaining stitches.
Join with a slip stitch.
This gentle decrease brings the upper inward and gives the slipper a more shoe-like shape.
Following Round
Work hdc evenly around.
Do not decrease.
The upper should now begin to curve naturally around the foot.
Creating the Ankle
Continue working hdc rounds until the upper reaches the desired ankle height.
For a cozy slipper boot, the shaft should rise above the ankle without being so tall that it becomes difficult for a toddler to put on.
Keep the sides even and check that the opening remains large enough for the child’s foot.
Optional Ribbed Cuff
For a stretchy cuff, switch to half double crochet through the back loop.
Cuff Round
Ch 1.
Hdc through the back loop only around.
Join with a slip stitch.
Repeat for several rounds until the cuff reaches your preferred height.
The ribbed texture gives the top of the slipper a flexible finish.
Finishing the Top Edge
For a simple finished edge, work one round of single crochet around the opening.
Join with a slip stitch.
Fasten off and weave in the yarn end securely.
You can use a contrasting color for this round to create a decorative border.
Optional Button Detail
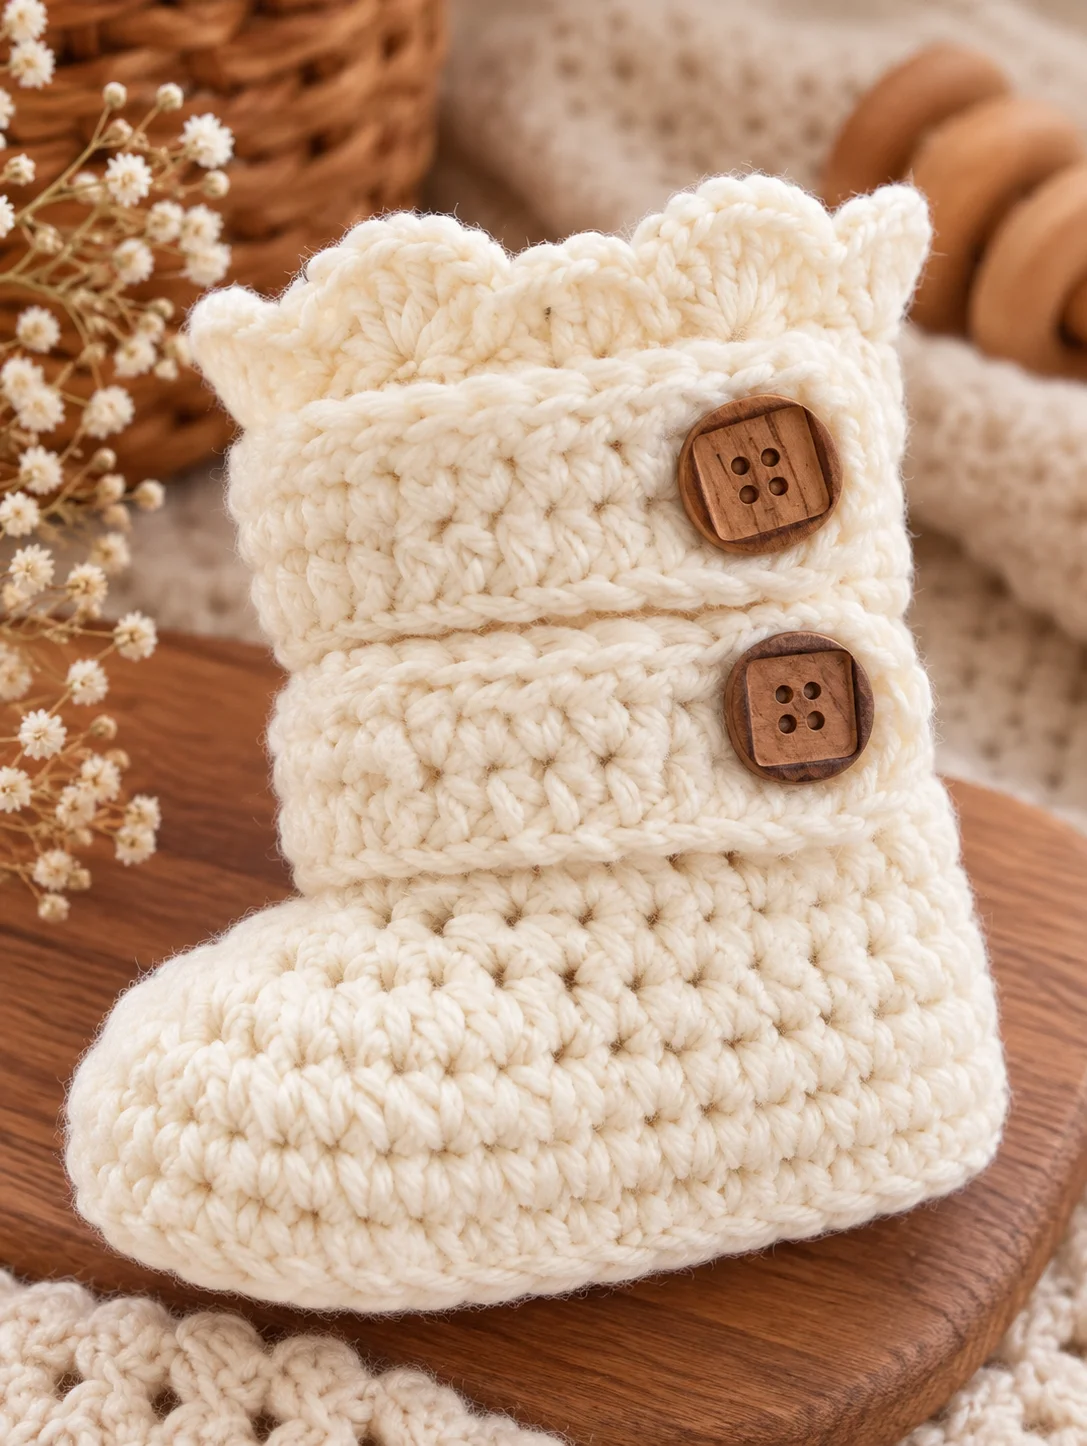
A button can give the slipper boots a classic decorative appearance.
Choose a button that is securely attached and appropriate for the intended wearer.
Sew the button firmly to the outside of the boot.
If the slippers are being made for a young child, avoid small detachable decorations that could present a choking hazard.
Add a Decorative Crochet Flower
For a girlier version, add a small crochet flower to the outer side of each boot.
Use a contrasting color for the flower so it stands out against the main boot color.
Sew the flower securely to the upper rather than attaching it with a loose piece of yarn.
Make the Boots in Different Colors
These toddler slipper boots are easy to customize with color.
Try:
- Cream and brown for a classic neutral look
- Gray with a white cuff
- Pink and cream
- Navy and gray
- Burgundy and oatmeal
- Mustard and brown
- Forest green and cream
A contrasting cuff can make a simple pair of boots look completely different.
Tips for Better-Fitting Toddler Slippers
Measure the Foot
Age-based sizing is only a guideline.
Measure from the back of the heel to the tip of the longest toe whenever possible.
Check the Sole Before Continuing
The sole is the most important part of the fit.
Before building the upper, compare the crocheted sole with the child’s foot.
Don’t Make the Upper Too Tight
The foot needs to slide comfortably into the slipper.
If the opening is too small, add another round or slightly loosen your tension.
Keep Both Boots the Same
Make sure the same number of rounds are used for both slippers.
It can help to write down the number of rounds completed on the first boot before starting the second.
Use a Stitch Marker
A stitch marker can help you identify the beginning of each round and makes it easier to keep your stitch counts consistent.
Common Mistakes to Avoid
Making the sole too short:
A toddler slipper should have enough room for the toes without being excessively long.
Skipping stitch counts:
Small changes in stitch counts can affect the shape of the sole and upper.
Making the ankle opening too tight:
A tight opening can make the slippers difficult for a toddler to put on.
Using very slippery yarn:
A smooth yarn can make house slippers more slippery on hard floors.
Adding loose decorations:
Any buttons or decorative pieces should be firmly secured and appropriate for the child.
Important Safety Note
These crochet slipper boots are intended as soft indoor footwear, not protective outdoor shoes.
Crochet soles can be slippery on smooth surfaces such as hardwood, tile, or laminate flooring. For toddlers who are walking independently, consider adding a suitable non-slip treatment designed for fabric footwear, and always check that it is securely bonded before use.
Supervise young children while wearing handmade slippers and inspect the boots regularly for loose yarn, buttons, or other damaged parts.
Frequently Asked Questions
What yarn is best for toddler crochet slipper boots?
A soft worsted-weight (#4) yarn works well for this style of slipper. Acrylic and acrylic-blend yarns are popular choices because they are widely available and generally easy to wash.
What hook size should I use?
A 5 mm (H-8) crochet hook is a good starting point for worsted-weight yarn.
Your tension may require a different hook size to achieve the desired sole measurements.
Can I make these crochet boots larger?
Yes. To make a larger pair, increase the sole length and width before building the upper.
For children’s footwear, measuring the actual foot is more reliable than simply adding a few stitches based on age.
Can I make these slippers for boys?
Absolutely. The basic boot shape is completely unisex.
Use neutral, blue, green, brown, gray, or other favorite colors, and skip decorative flowers if you want a simpler style.
Can I add a fluffy cuff?
Yes. A soft textured or fuzzy yarn can be used for the final cuff, provided the yarn is comfortable and the resulting opening still fits properly.
Are crochet slipper boots safe for toddlers?
They can be used as indoor soft footwear, but crochet slippers may slide on smooth flooring. Always consider traction and supervise young children. Decorative pieces must also be securely attached.
Final Thoughts
These crochet toddler slipper boots are a cozy handmade project for chilly days. The classic boot silhouette gives them a little more coverage than ordinary crochet slippers, while the ribbed cuff helps create a snug and comfortable finish.
Experiment with colors, add a contrasting cuff, or keep the design simple for an everyday pair. Once you’ve made one pair, you’ll have a practical crochet pattern that can be adapted for future sizes and different yarn combinations.