Simple Crochet Baby Mittens | Free Easy Pattern
Simple Crochet Baby Mittens
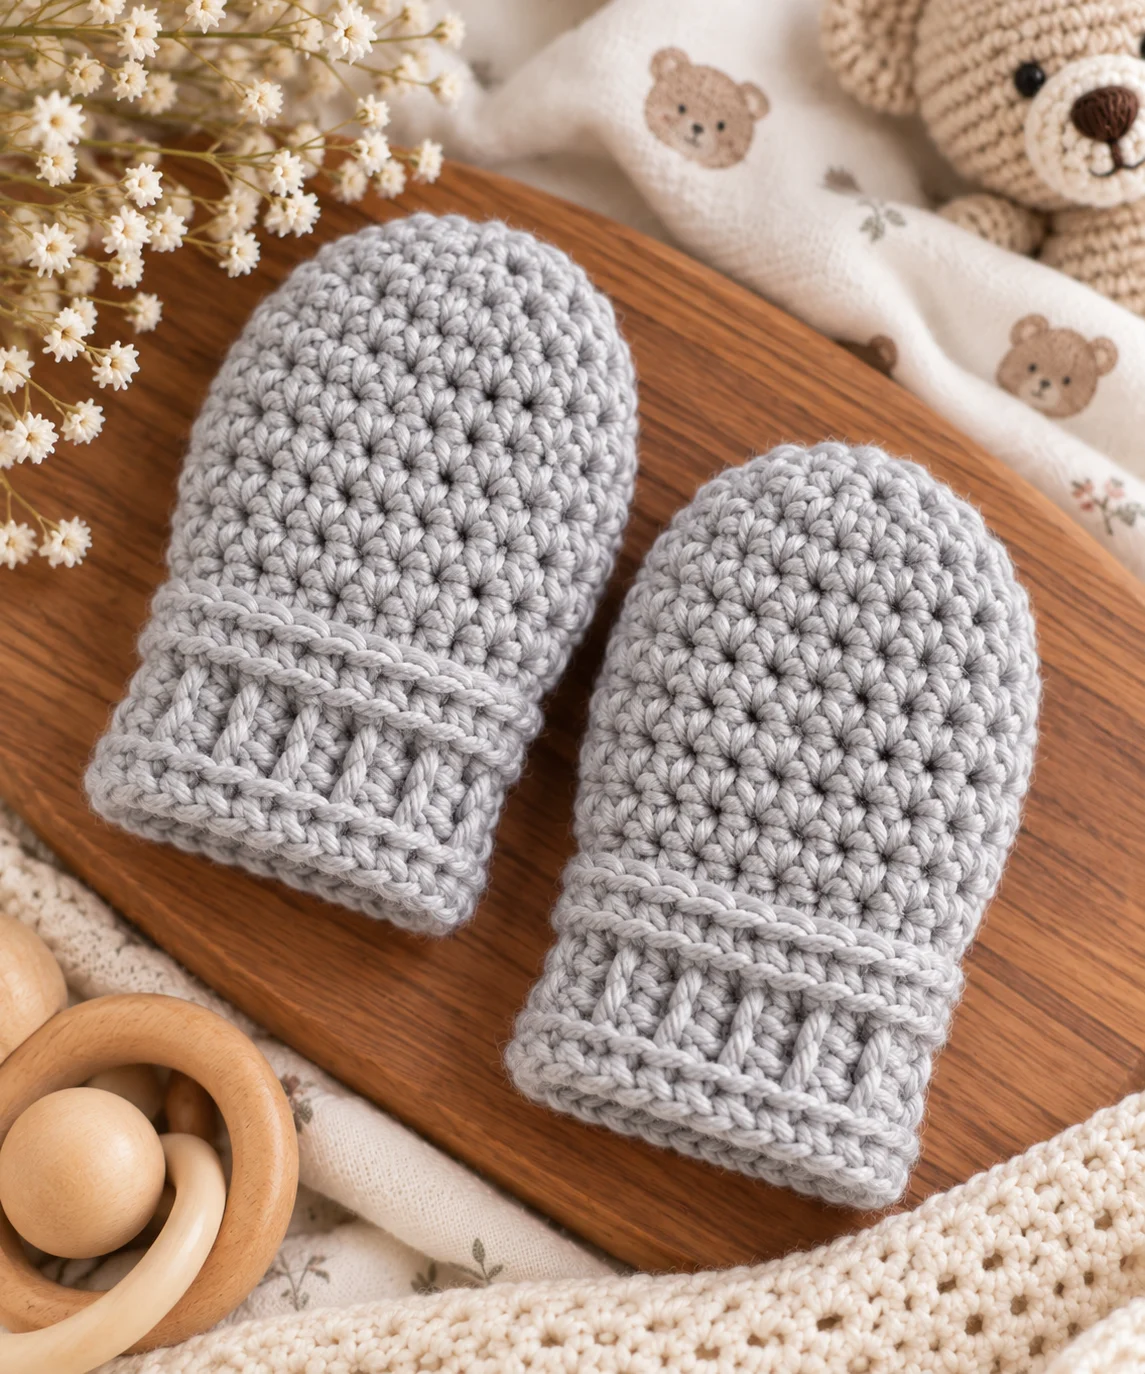
Keep tiny fingers warm with these simple crochet baby mittens! This beginner-friendly pattern creates a soft pair of little mittens using basic crochet stitches and a straightforward construction.
Baby mittens are a wonderful small project for using leftover yarn, making a baby shower gift, or adding a handmade touch to a newborn outfit. The design is intentionally simple, with a snug wrist and roomy hand section that makes the mittens comfortable for little hands.
Make them in a classic neutral shade or choose a soft pastel to coordinate with a baby’s wardrobe.
Simple Crochet Baby Mittens at a Glance
- Skill level: Easy
- Size: Newborn–3 months
- Yarn: Lightweight DK (#3) yarn
- Hook: 3.5 mm (E-4)
- Main stitch: Single crochet
- Construction: Worked in rounds
- Pair: Make 2 identical mittens
- Terminology: US crochet terms
Materials
You will need:
- DK-weight (#3) soft baby yarn
- 3.5 mm crochet hook
- Yarn needle
- Scissors
- Stitch marker
Choose a soft, washable yarn intended for baby garments and accessories. Avoid scratchy fibers or yarns with loose decorative fibers that could irritate delicate skin.
Crochet Abbreviations
- ch – chain
- sc – single crochet
- sl st – slip stitch
- st – stitch
- sts – stitches
- BLO – back loop only
Finished Size
The finished mittens are approximately:
- Length: 4 inches
- Width: approximately 2 inches
These measurements are approximate because crochet tension varies.
For a baby accessory, compare the finished mitten with the baby’s hand whenever possible. It should be comfortably roomy without being so large that it can easily slip off.
Gauge
Approximately:
18 sc × 20 rounds = 4 inches
Gauge is not as important for a small baby mitten as it is for a fitted garment, but it can help you achieve a more predictable size.
If your mitten is coming out too large, use a smaller hook. If it is too small, try a larger hook.
Simple Crochet Baby Mittens Pattern
The mitten is crocheted from the wrist toward the fingertips.
The wrist section is slightly narrower, while the hand widens gently to create enough room for the baby’s fingers.
Make two identical mittens.
Wrist
Make a magic ring.
Round 1
Work 6 sc into the magic ring.
Do not turn.
Place a stitch marker in the first stitch.
(6 sts)
Round 2
Work 2 sc in each stitch around.
(12 sts)
Round 3
Sc in the next stitch, 2 sc in the next stitch.
Repeat around.
(18 sts)
Round 4
Sc in each stitch around.
(18 sts)
The opening should now be large enough to begin forming the baby’s hand section.
Hand
Rounds 5–12
Sc in each stitch around.
(18 sts)
Continue working in the round without turning.
The mitten will begin to take shape as a small tube.
Shaping the Top
The upper portion is gradually decreased so the mitten closes gently over the baby’s fingers.
Round 13
Sc in the next stitch, sc2tog.
Repeat around.
(12 sts)
Round 14
Sc2tog around.
(6 sts)
Fasten off, leaving a yarn tail.
Use the yarn needle to weave the tail through the remaining stitches.
Pull gently to close the top.
Secure the yarn and weave in the remaining end.
Make the Second Mitten
Repeat the complete pattern to make the second mitten.
Since this design does not have a separate thumb, both mittens can be made exactly the same.
Optional Ribbed Wrist
If you’d like a more textured wrist, work the first few rounds through the back loop only.
Working through the back loop creates small horizontal ridges and gives the wrist a little extra stretch.
You can use the same stitch count and simply change the stitch placement for the desired number of rounds.
Optional Crochet Cord
If you want the mittens to stay together as a pair, you can make a soft crochet cord.
Chain a length long enough to connect the two mittens when they are worn.
Slip stitch along the chain or leave it as a simple chain, depending on the look you prefer.
Attach one end securely to each mitten.
Important: Never use a mitten cord around a baby’s neck. Keep any connecting cord short and designed only to keep the mittens together when the garment is being worn appropriately.
For very young babies, individual mittens without a connecting cord are the simpler option.
How to Customize the Baby Mittens
Change the Color
These tiny mittens use very little yarn, making them perfect for experimenting with color.
Try:
- Cream
- Soft pink
- Powder blue
- Sage
- Lavender
- Butter yellow
- Gray
- Beige
You can also use one color for the mitten and another for the wrist.
Add a Simple Border
Work one round of single crochet around the wrist opening in a contrasting color.
This creates a clean finished edge and adds a small pop of color.
Make Larger Mittens
To make the mittens suitable for an older baby, add additional increase rounds before working the straight rounds.
You can also add extra rounds to increase the length.
Measure the baby’s hand whenever possible rather than relying solely on age.
Tips for Crocheting Baby Mittens
Keep the Fabric Soft
Avoid crocheting extremely tightly.
A dense fabric can make the mitten stiff and reduce its flexibility.
Check the Opening
The wrist should be snug enough to stay on but never tight enough to leave deep marks on the baby’s skin.
Count Your Stitches
Small projects can still become distorted if stitches are accidentally added or skipped.
Use a stitch marker to identify the beginning of each round.
Weave in Ends Securely
Baby items are washed and handled frequently, so take extra care when securing your yarn tails.
Trim excess yarn only after the ends are securely woven into the fabric.
Common Mistakes to Avoid
Making the wrist too tight:
The mitten should slide comfortably over the baby’s hand.
Skipping increases:
The increase rounds create the space needed for the hand.
Over-decreasing the top:
Too many decreases can make the mitten narrow and uncomfortable.
Leaving long yarn tails:
Secure and trim your ends carefully.
Adding loose decorations:
Small buttons, beads, or other detachable decorations are not appropriate for baby mittens because they can become choking hazards.
Baby Safety
Baby mittens should always be checked carefully before use.
Make sure:
- All yarn ends are securely woven in.
- There are no loose pieces.
- Decorative elements are avoided or firmly secured.
- The mitten is not tight around the wrist.
- The baby is supervised while wearing the mittens.
Do not use long cords, strings, or straps that could create a strangulation hazard.
Inspect handmade baby accessories regularly, especially after washing.
Frequently Asked Questions
What yarn is best for crochet baby mittens?
A soft DK-weight (#3) washable yarn is a good choice. Look for yarn that is comfortable against delicate skin and easy to care for.
Are these crochet baby mittens beginner-friendly?
Yes. The pattern primarily uses single crochet and simple increases and decreases, making it a manageable project for a beginner who knows basic crochet stitches.
Do these mittens have thumbs?
No. These are simple baby mittens without a separate thumb section. This keeps the construction easy and makes the mittens quick to crochet.
How do I keep baby mittens from falling off?
A properly fitting wrist helps keep them in place. Avoid making the wrist excessively loose, but make sure it is never uncomfortably tight.
Can I make these mittens for a larger baby?
Yes. Increase the hand circumference and add additional rounds for length. Measuring the baby’s hand is the most reliable way to customize the fit.
How much yarn do baby mittens use?
They require only a small amount of yarn, although the exact amount depends on yarn weight, tension, hook size, and any modifications.
Final Thoughts
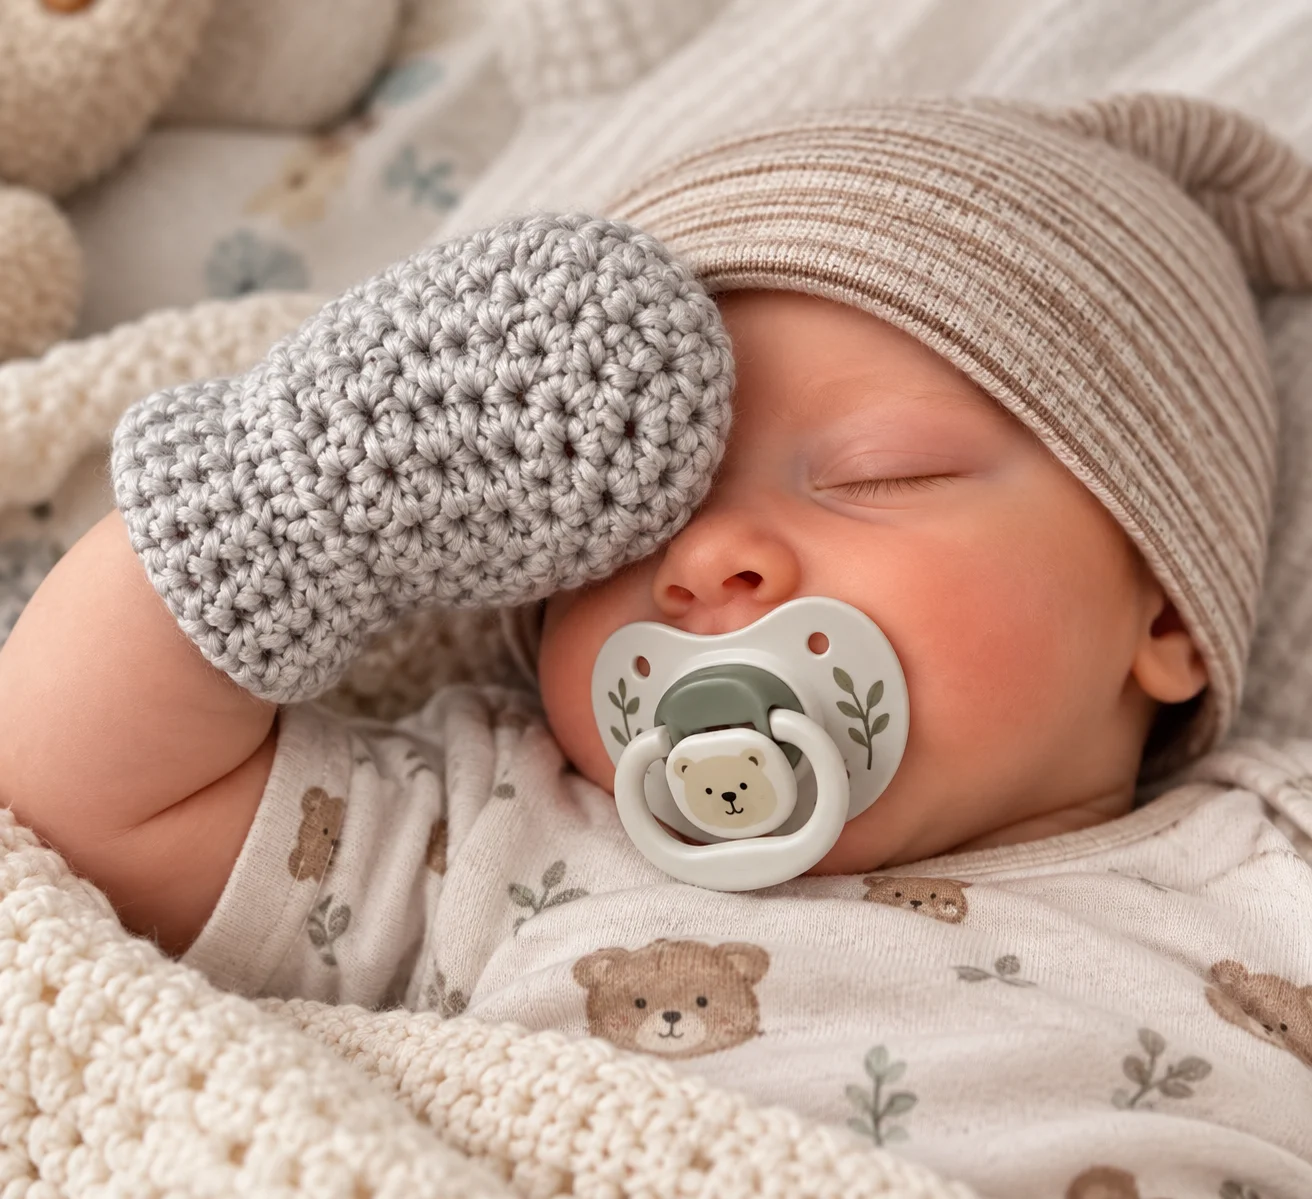
These simple crochet baby mittens are a sweet little project for keeping tiny hands cozy during cooler weather. With basic stitches, a small amount of yarn, and a straightforward round construction, they are easy to customize and quick to make.
Choose a soft baby-friendly yarn, keep the fit comfortable, and make a pair in a favorite color for a thoughtful handmade baby gift.
Keep tiny fingers warm with these simple crochet baby mittens! This beginner-friendly pattern creates a soft pair of little mittens using basic crochet stitches and a straightforward construction.
Baby mittens are a wonderful small project for using leftover yarn, making a baby shower gift, or adding a handmade touch to a newborn outfit. The design is intentionally simple, with a snug wrist and roomy hand section that makes the mittens comfortable for little hands.
Make them in a classic neutral shade or choose a soft pastel to coordinate with a baby’s wardrobe.
Simple Crochet Baby Mittens at a Glance
- Skill level: Easy
- Size: Newborn–3 months
- Yarn: Lightweight DK (#3) yarn
- Hook: 3.5 mm (E-4)
- Main stitch: Single crochet
- Construction: Worked in rounds
- Pair: Make 2 identical mittens
- Terminology: US crochet terms
Materials
You will need:
- DK-weight (#3) soft baby yarn
- 3.5 mm crochet hook
- Yarn needle
- Scissors
- Stitch marker
Choose a soft, washable yarn intended for baby garments and accessories. Avoid scratchy fibers or yarns with loose decorative fibers that could irritate delicate skin.
Crochet Abbreviations
- ch – chain
- sc – single crochet
- sl st – slip stitch
- st – stitch
- sts – stitches
- BLO – back loop only
Finished Size
The finished mittens are approximately:
- Length: 4 inches
- Width: approximately 2 inches
These measurements are approximate because crochet tension varies.
For a baby accessory, compare the finished mitten with the baby’s hand whenever possible. It should be comfortably roomy without being so large that it can easily slip off.
Gauge
Approximately:
18 sc × 20 rounds = 4 inches
Gauge is not as important for a small baby mitten as it is for a fitted garment, but it can help you achieve a more predictable size.
If your mitten is coming out too large, use a smaller hook. If it is too small, try a larger hook.
Simple Crochet Baby Mittens Pattern
The mitten is crocheted from the wrist toward the fingertips.
The wrist section is slightly narrower, while the hand widens gently to create enough room for the baby’s fingers.
Make two identical mittens.
Wrist
Make a magic ring.
Round 1
Work 6 sc into the magic ring.
Do not turn.
Place a stitch marker in the first stitch.
(6 sts)
Round 2
Work 2 sc in each stitch around.
(12 sts)
Round 3
Sc in the next stitch, 2 sc in the next stitch.
Repeat around.
(18 sts)
Round 4
Sc in each stitch around.
(18 sts)
The opening should now be large enough to begin forming the baby’s hand section.
Hand
Rounds 5–12
Sc in each stitch around.
(18 sts)
Continue working in the round without turning.
The mitten will begin to take shape as a small tube.
Shaping the Top
The upper portion is gradually decreased so the mitten closes gently over the baby’s fingers.
Round 13
Sc in the next stitch, sc2tog.
Repeat around.
(12 sts)
Round 14
Sc2tog around.
(6 sts)
Fasten off, leaving a yarn tail.
Use the yarn needle to weave the tail through the remaining stitches.
Pull gently to close the top.
Secure the yarn and weave in the remaining end.
Make the Second Mitten
Repeat the complete pattern to make the second mitten.
Since this design does not have a separate thumb, both mittens can be made exactly the same.
Optional Ribbed Wrist
If you’d like a more textured wrist, work the first few rounds through the back loop only.
Working through the back loop creates small horizontal ridges and gives the wrist a little extra stretch.
You can use the same stitch count and simply change the stitch placement for the desired number of rounds.
Optional Crochet Cord
If you want the mittens to stay together as a pair, you can make a soft crochet cord.
Chain a length long enough to connect the two mittens when they are worn.
Slip stitch along the chain or leave it as a simple chain, depending on the look you prefer.
Attach one end securely to each mitten.
Important: Never use a mitten cord around a baby’s neck. Keep any connecting cord short and designed only to keep the mittens together when the garment is being worn appropriately.
For very young babies, individual mittens without a connecting cord are the simpler option.
How to Customize the Baby Mittens
Change the Color
These tiny mittens use very little yarn, making them perfect for experimenting with color.
Try:
- Cream
- Soft pink
- Powder blue
- Sage
- Lavender
- Butter yellow
- Gray
- Beige
You can also use one color for the mitten and another for the wrist.
Add a Simple Border
Work one round of single crochet around the wrist opening in a contrasting color.
This creates a clean finished edge and adds a small pop of color.
Make Larger Mittens
To make the mittens suitable for an older baby, add additional increase rounds before working the straight rounds.
You can also add extra rounds to increase the length.
Measure the baby’s hand whenever possible rather than relying solely on age.
Tips for Crocheting Baby Mittens
Keep the Fabric Soft
Avoid crocheting extremely tightly.
A dense fabric can make the mitten stiff and reduce its flexibility.
Check the Opening
The wrist should be snug enough to stay on but never tight enough to leave deep marks on the baby’s skin.
Count Your Stitches
Small projects can still become distorted if stitches are accidentally added or skipped.
Use a stitch marker to identify the beginning of each round.
Weave in Ends Securely
Baby items are washed and handled frequently, so take extra care when securing your yarn tails.
Trim excess yarn only after the ends are securely woven into the fabric.
Common Mistakes to Avoid
Making the wrist too tight:
The mitten should slide comfortably over the baby’s hand.
Skipping increases:
The increase rounds create the space needed for the hand.
Over-decreasing the top:
Too many decreases can make the mitten narrow and uncomfortable.
Leaving long yarn tails:
Secure and trim your ends carefully.
Adding loose decorations:
Small buttons, beads, or other detachable decorations are not appropriate for baby mittens because they can become choking hazards.
Baby Safety
Baby mittens should always be checked carefully before use.
Make sure:
- All yarn ends are securely woven in.
- There are no loose pieces.
- Decorative elements are avoided or firmly secured.
- The mitten is not tight around the wrist.
- The baby is supervised while wearing the mittens.
Do not use long cords, strings, or straps that could create a strangulation hazard.
Inspect handmade baby accessories regularly, especially after washing.
Frequently Asked Questions
What yarn is best for crochet baby mittens?
A soft DK-weight (#3) washable yarn is a good choice. Look for yarn that is comfortable against delicate skin and easy to care for.
Are these crochet baby mittens beginner-friendly?
Yes. The pattern primarily uses single crochet and simple increases and decreases, making it a manageable project for a beginner who knows basic crochet stitches.
Do these mittens have thumbs?
No. These are simple baby mittens without a separate thumb section. This keeps the construction easy and makes the mittens quick to crochet.
How do I keep baby mittens from falling off?
A properly fitting wrist helps keep them in place. Avoid making the wrist excessively loose, but make sure it is never uncomfortably tight.
Can I make these mittens for a larger baby?
Yes. Increase the hand circumference and add additional rounds for length. Measuring the baby’s hand is the most reliable way to customize the fit.
How much yarn do baby mittens use?
They require only a small amount of yarn, although the exact amount depends on yarn weight, tension, hook size, and any modifications.
Final Thoughts
These simple crochet baby mittens are a sweet little project for keeping tiny hands cozy during cooler weather. With basic stitches, a small amount of yarn, and a straightforward round construction, they are easy to customize and quick to make.
Choose a soft baby-friendly yarn, keep the fit comfortable, and make a pair in a favorite color for a thoughtful handmade baby gift.